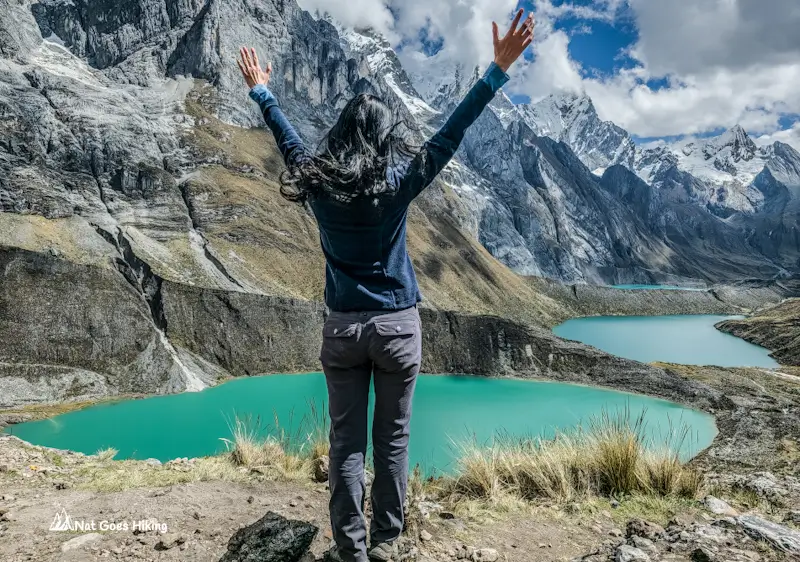
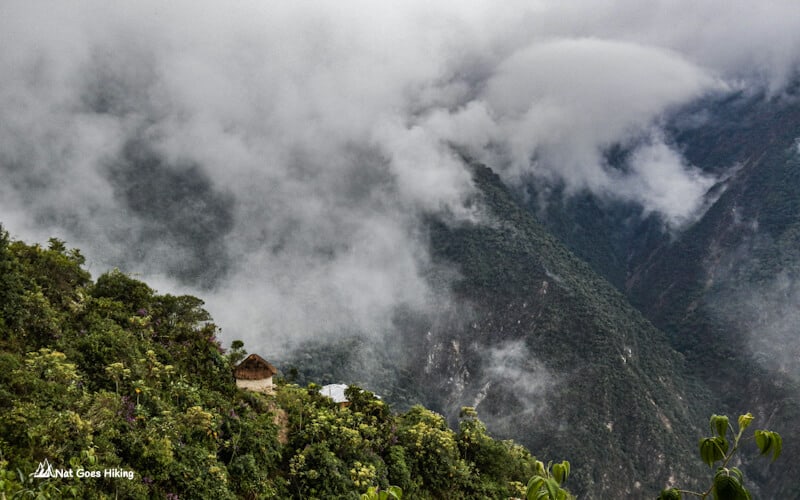
We set out to hike one of the most breathtaking treks in Peru and thought everything would go to plan. But we ended up doing the mini Huayhuash Trek instead.
In just 3 days on the trail, we still saw some of the most iconic views on the Huayhuash Trek.
If you don’t have 8–10 days, are unsure about committing to the full circuit, or just want a shorter high-altitude adventure without a guide, this mini Huayhuash Trek might be exactly what you’re looking for.
We did this mini Huayhuash Trek in July 2025, and in this guide, I’ll break down our exact itinerary from Quartelhuain to Tupac Amaru, including distances, elevation, campsites, and the logistics of getting to the trailhead and back to Huaraz from Tupac Amaru.
Mini Huayhuash Trek: Quick Overview and Route Explanation
Originally, we planned to hike the full Huayhuash Trek over 10–12 days, starting in Quartelhuain and finishing in Llamac. That full circuit is shown in blue on the map.
Mini Huayhuash Trek Overview
- Trail type: Point-to-point / Multi-day trek
- Duration: 4 days
- Total distance: 41 km / 25.47 miles
- Starting point: Quartelhuain 4,170 m / 13,681 ft
- Ending point: Tupac Amaru 3,963 m / 13,002 ft
- Elevation gain: 1,933 m / 6,342 ft
- Elevation loss: 1,898 m / 6,227 ft
- Lowest point: Tupac Amaru 3,963 m / 13,002 ft
- Highest point: Siula Pass 4,830 m / 15,846 ft
- Difficulty: Moderate to challenging (due to high altitude)
- Best season: Dry season (May–September)
- Accommodation: Campsites
We also had a backup plan. If the weather turned bad, we could exit early in Huayllapa. From there, it’s possible to get a taxi (often shared with other trekkers), and there’s basic accommodation, hot showers, a small shop, and cooked food.
Things didn’t quite go to plan. My partner got sick on Day 3, so we had to cut the trek short. Instead of completing the full trek, we ended up doing a mini Huayhuash Trek over 4 days. This shorter route is shown in red, starting in Quartelhuain and finishing in Tupac Amaru.
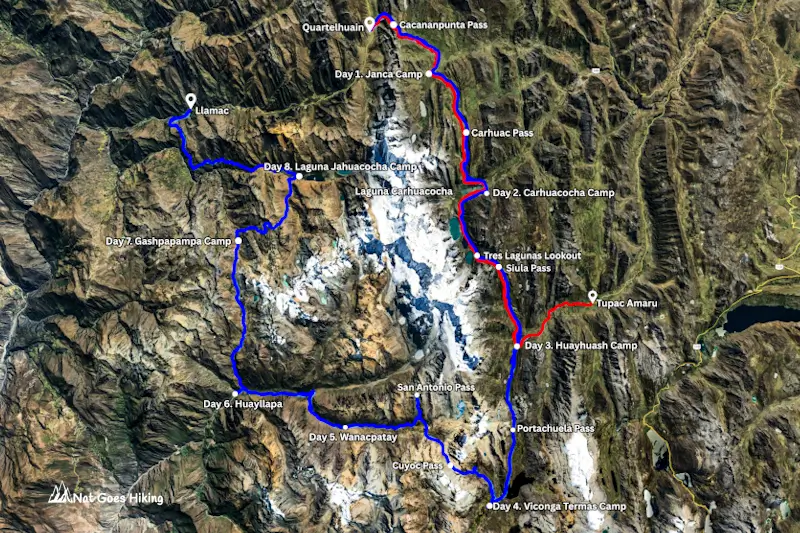
The first three days followed our original plan, so we still saw some of the most iconic landscapes on the Huayhuash Trek.
From Huayhuash Camp, we took an alternative exit route towards Tupac Amaru, a small, remote settlement that doesn’t appear in most itineraries. In total, our mini Huayhuash Trek covered around 41 km.
Why do mini Huayhuash Trek?
The classic Huayhuash Trek is one of the best high-altitude hikes in Peru, but it’s also long, remote, and physically demanding. Not everyone has 10–12 days, and not everyone wants to commit to a full circuit at over 4,500 m. That’s exactly why a mini Huayhuash Trek makes a lot of sense.
You still see the best views
Most of the iconic views on the Huayhuash Trek are still in the first few days. You still get to see Laguna Carhuacocha viewpoint with close-up views of Yerupajá, Siula Grande, and Jirishanca, The Three Lakes View (Mirador Tres Lagunas), Yerupajá and Siula Grande views from Siula Pass.
It fits into a normal itinerary
Not everyone wants to commit 10-12 days to do one trek. A short Huayhuash Trek is much easier to fit into a Peru trip, especially if you’re also visiting other regions.
Easier to do independently
If you hike independently, a shorter route is much more manageable. Your backpack will also be lighter, as you won’t need to carry food for 10 days.
Huayhuash Trek: How to get to the trailhead
1. Trailhead options
Getting to the start of the Huayhuash Trek is not complicated, but it does take a bit of planning. There are two common trailheads: Llamac and Quartelhuain. We started from Quartelhuain, and honestly, I think it is the best option.
Llamac Trailhead – Cheaper option
Llamac used to be the classic starting point for the Huayhuash Trek, and it’s still the easiest to reach using public transport.
From what I’ve seen (and after watching quite a few recent videos), most trekkers now start from Quartelhuain, which is about 16 km further along the dirt road from Llamac.
Start from Llamac if you’re on a tight budget. But keep in mind that you’ll need to walk 16 km along a dusty road used by cars before the real mountain scenery begins.
How to get to Llamac
From Huaraz, take an early morning bus (around 5 am) to Chiquián.
Two companies run this route:
- Transportes Nazario
- El Rápido
El Rápido charges around S/15, or S/20 if you have a large backpack (this is what we were quoted at their office). Nazario’s prices should be similar.
From Chiquián, Nazario runs a service to Llamac, usually departing around 8:30 am. I didn’t check the prices myself for this leg. They vary depending on the source, but expect to pay anywhere between S/20 and S/40.
Quartelhuain – More convenient option
Quartelhuain sits deeper in the mountains and is a much better starting point. This is where we started, and I highly recommend it.
By starting from Quartelhuain, we skipped the long, dusty road section from Llamac and got straight to the mountain scenery. It saved us much-needed time and energy.
But the downside is that it is more expensive to get there, as there is no public transport to Quartelhuain.
How to get to Quartelhuain
There’s no regular public transport all the way to Quartelhuain, and we explored several options for getting there.
Option 1: Nazario (semi-public option)
We checked with the Nazario office in Huaraz, and they quoted S/100 for transport to Quartelhuain.
This includes:
- bus from Huaraz to Chiquián
- transfer from Chiquián to Quartelhuain
That said, the second leg isn’t a fully regular route. Also worth noting that Nazario has mixed reviews online.
I checked with the Nazario office in Huaraz, and they advised it was S/100 to get with them from Huaraz to Quartelhuain. The first leg is their regular bus from Huaraz to Chiquián, and then you change to Nazario special service from Chiquián to Quartelhuain. Also worth mentioning that Nazario has mixed reviews online.
Option 2: Travel agencies
We asked a few agencies if we could join their vans heading to the trailhead.
For example:
- Andean Summit quoted S/120 per person (but it’s not guaranteed. If their tour fills up, you’re out of luck, which is exactly what happened to us).
- Another agency offered a private transfer for S/450.
Option 3: Direct van to Quartelhuain – what we did
We ended up booking with Andean Kingdom in Huaraz, and this turned out to be the best option. They work with a company running daily services from Huaraz to Quartelhuain and from Llamac to Huaraz.
- Cost: S/100 per person
- Pickup: 4:30 am from our hotel
- Travel time: ~5.5 hours
- Drop-off: directly at Quartelhuain
The van actually arrived early (4:20 am), picked up a couple of other hikers, and we were on the road straight away.
This was by far the easiest option: no changing transport, no uncertainty, and no wasted energy.
On the way to Quartelhuain, we stopped twice to pay community fees:
- S/50 near Llamac
- S/20 near Pocpa
The same company runs a daily van from Llamac to Huaraz, departing around 11 am–12 pm. The fare is S/80. Email me if you need their direct contact number.
Why I recommend starting from Quartelhuain
- You skip the 16 km dusty road from Llamac
- You save energy for the actual trek
- You start straight in the mountains
- It’s more time-efficient
You really don’t want to be covered in dust on your first day of the Huayhuash Trek.
Mini Huayhuash Trek: Trail Notes & Our Experience
Day 1. Quartelhuain to Janca Camp via Cacanapunta Pass
Mini Huayhuash Trek Day 1 Overview
- Route: Quartelhuain – Cacanapunta Pass – Janca Camp
- Elevation gain: 650 m / 2,133 ft
- Starting elevation: Quartelhuain 4,170 m / 13,681 ft
- Lowest point: Quartelhuain 4,170 m / 13,681 ft
- Distance: 8.85 km / 5.5 miles
- Elevation loss: 495 m / 1,624 ft
- Ending elevation: Janca Camp 4,250 m / 13,943 ft
- Highest point: Cacanapunta Pass 4,680 m / 15,354 ft
Climb to Cacanapunta Pass
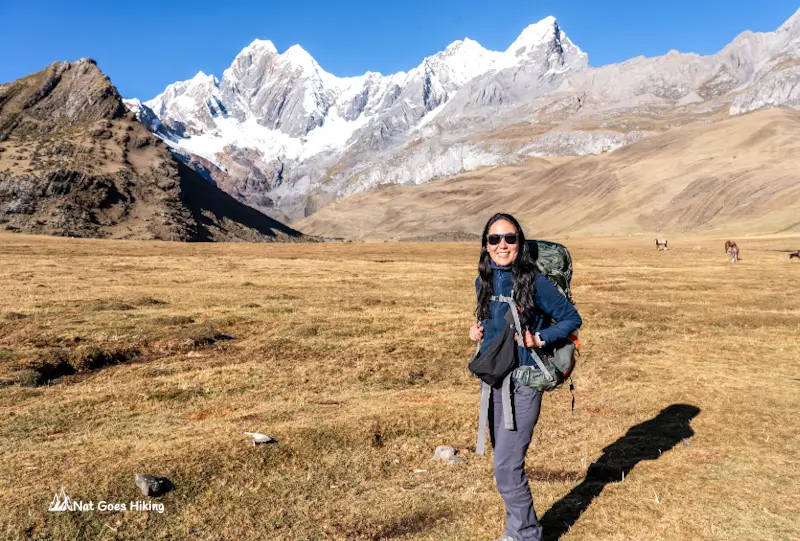
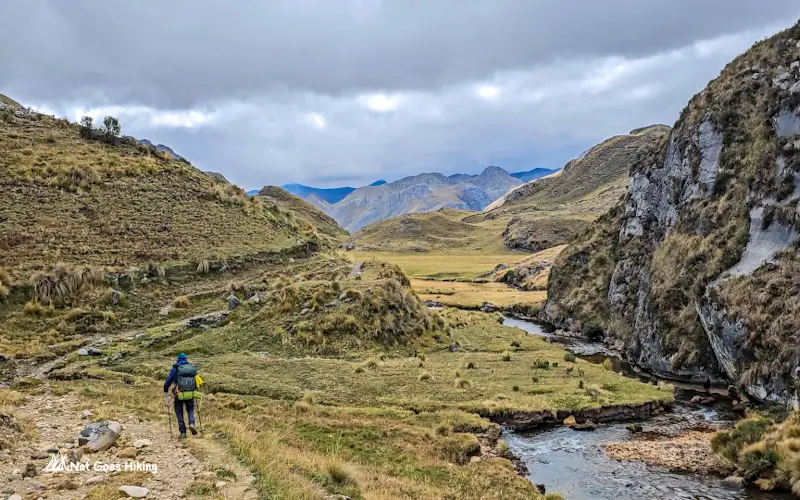
We arrived at Quartelhuain (4,170 m /13,681 ft) around 10 am and started our first day on the mini Huayhuash Trek.
At Quartelhuain, there are toilets and a campground, and some tour groups stay there overnight. Since we arrived in the morning, we headed towards Cacanapunta Pass (4,680 m /15,354 ft). The total elevation gain to the pass was around 650 m /2,133 ft.
The trail starts gently but gradually gets steeper. Nothing too technical, just a steady uphill grind at altitude. It took us about 2.5 hours to reach the pass, arriving around 12:30 pm.
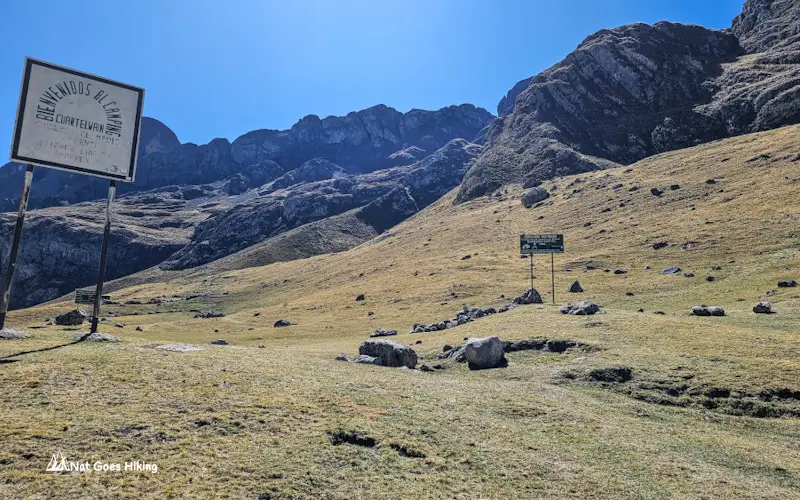
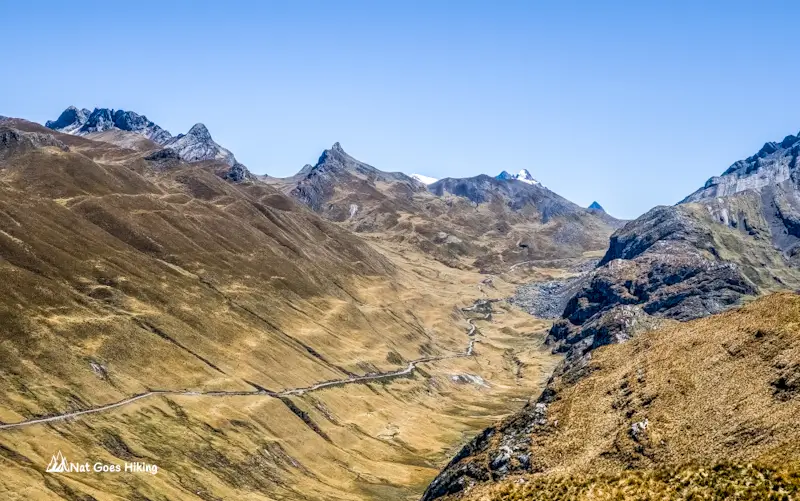
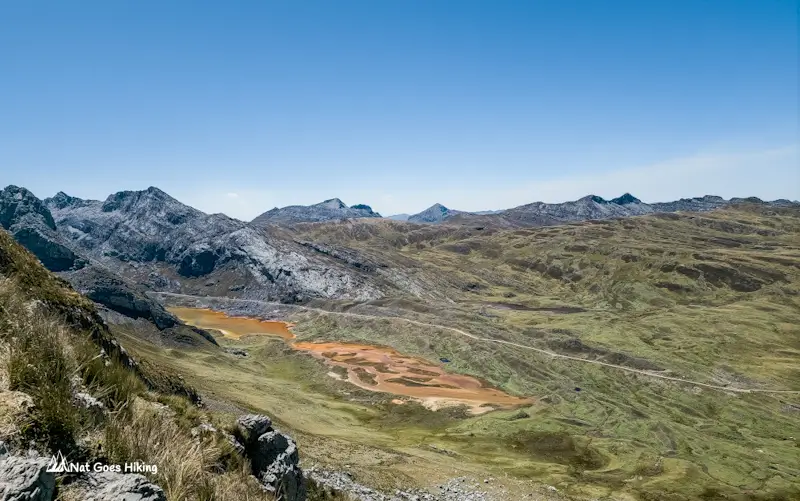
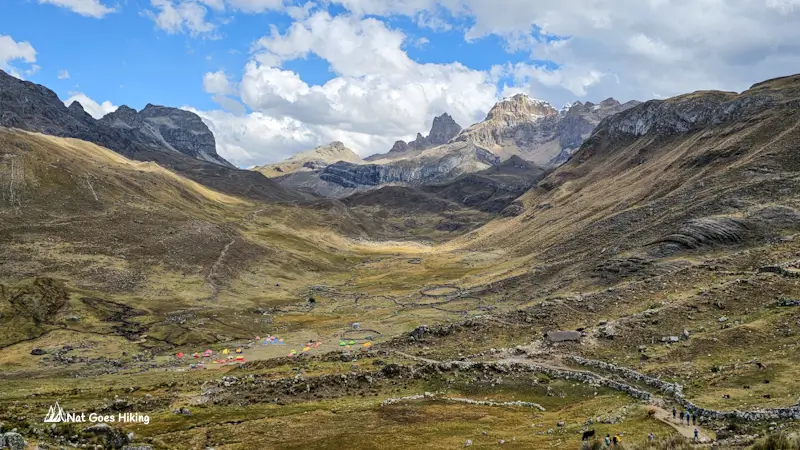
At Cacanapunta Pass
The views from Cacanapunta Pass are incredible. You get a huge open valley stretching out below, with rolling grass hills, a winding stream, and a dirt track disappearing into the distance. Off to the left, there’s a rust-red lake tucked beneath jagged rocky peaks.
From Cacanapunta Pass to Janca Camp
After a short break, we started the descent. The first section is a bit steep, but it quickly turns into a gentle downhill.
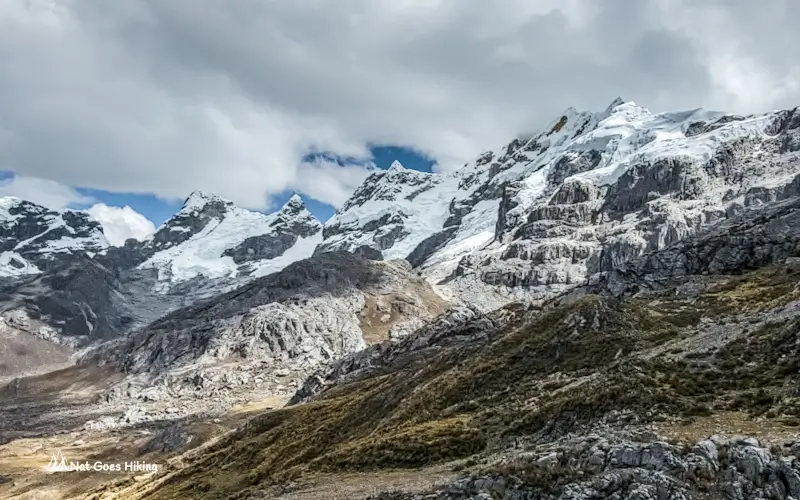
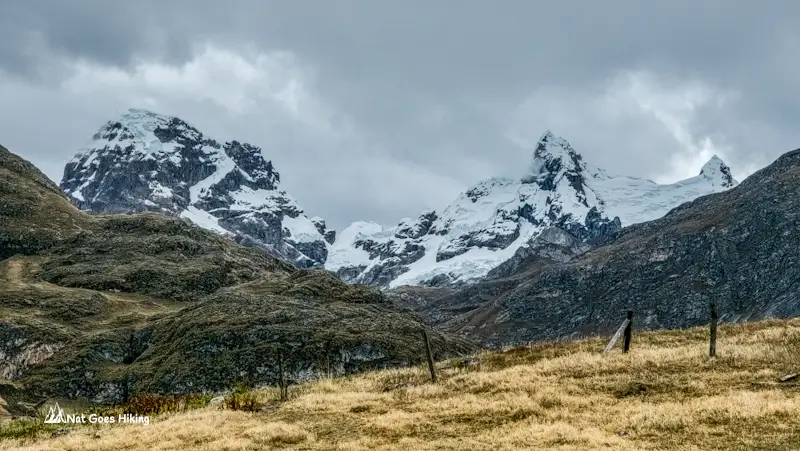
On the way down, we stopped for some snacks and enjoyed the views. About 1.5 hours after leaving the pass, the first snow-capped peaks came into view. Another 30 minutes later, we reached Janca Camp.
Staying at Janca Camp
Just before entering the camp, you’ll need to pay a community fee of S/40 per person.
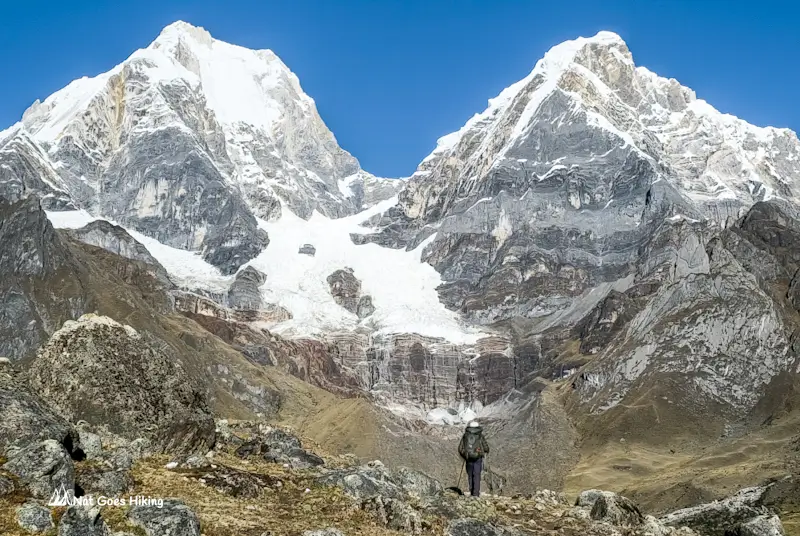
The real reward on Day 1 is the campsite itself. You’re setting up your tent with snow-capped peaks right in front of you, with glaciers spilling down the mountains. Not a bad way to end your first day on the trek. In fact, I think it was the best view on day 1 of our mini Huayhuash Trek.
When we arrived, it felt pretty quiet, and the trail hadn’t been busy during the day. But by late afternoon, the camp filled up quickly, mostly with organised tour groups.
We were considering camping closer to Laguna Mitucocha, but when we went in that direction, it was boggy and wet, so we just stayed at Janca Camp, which had toilets and a water tap fed directly from the mountains.
We set up our tent, had a late lunch/early dinner, and enjoyed endless cups of hot coca tea.
Tip: fill up your water bottles in the evening. Overnight temperatures drop below 0°C, and the water in the pipes can freeze, meaning no running water in the morning.
Day 2. Janca Camp to Laguna Carhuacocha via Carhuac Pass
Mini Huayhuash Trek Day 2 Overview
- Route: Janca Camp – Carhuac Pass – Laguna Carhuacocha
- Elevation gain: 403 m / 1,322 ft
- Starting elevation: Janca Camp 4,250 m / 13,943 ft
- Lowest point: Laguna Carhuacocha 4,180 m / 13,714 ft
- Distance: 10.1 km / 6.3 miles
- Elevation loss: 453 m / 1,486 ft
- Ending elevation: Laguna Carhuacocha 4,150 m / 13,615 ft
- Highest point: Carhuac Pass 4,630 m / 15,190 ft
Morning at Janca Camp
The next morning, we woke up at 5 am while it was still dark. Our tent was frozen solid. I stayed in my sleeping bag until about 6, then we had breakfast and packed up camp. The weather couldn’t have been better.
Climb to Carhuac Pass
We left the camp at 8:20 am and started our hike towards Carhuac Pass (4,630 m /15,190 ft). This is one of the easier climbs on the Huayhuash Trek, with 403 m /1,322 ft of elevation gain over 4.9 km /3 mi. It’s a steady uphill, but very, very gentle.
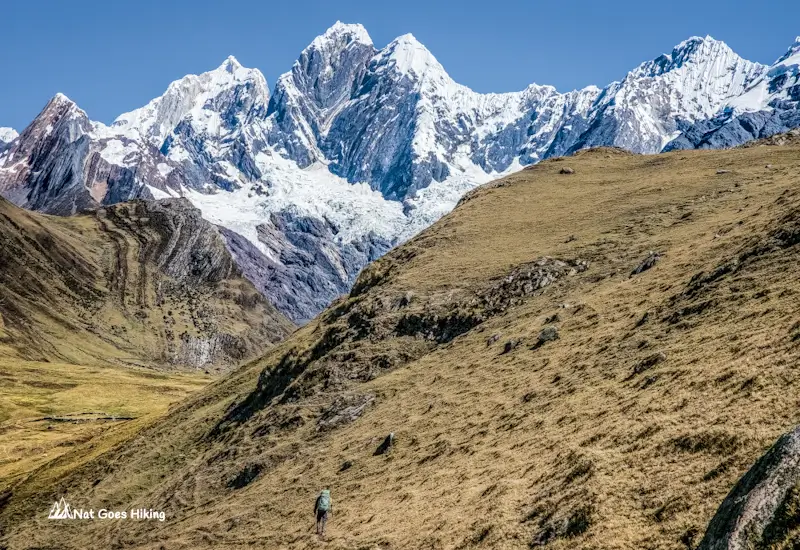
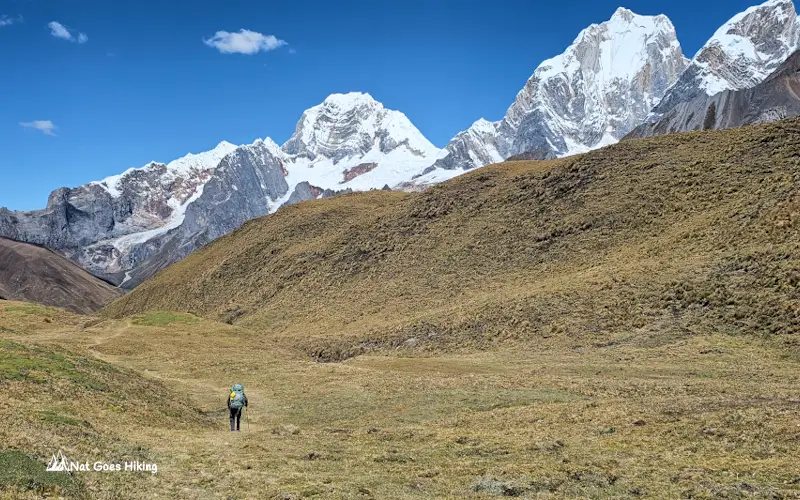
We hiked through a valley surrounded by yellowish hills, and it took us 2 hours 45 minutes to reach the pass. As we got closer to the top, the views started to open up.
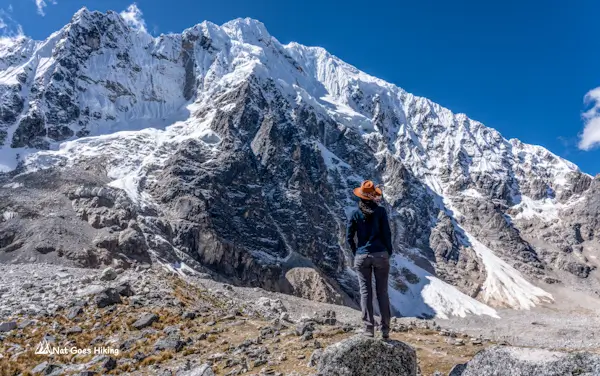
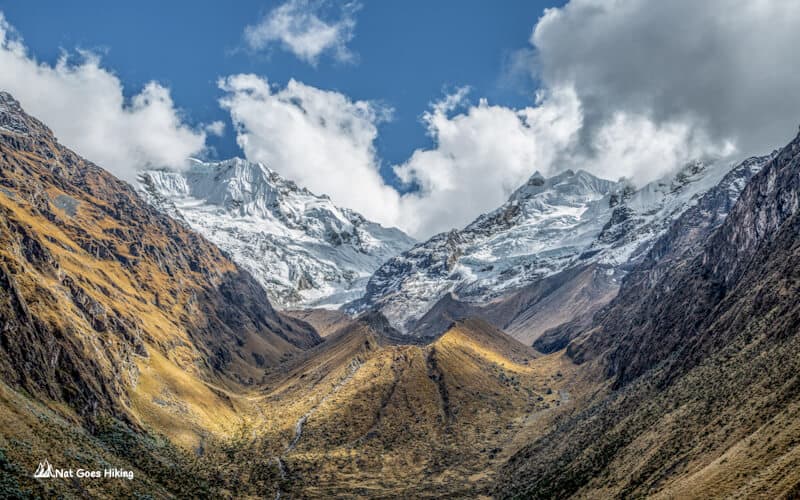
As we approached Carhuac Pass, the big snow-capped peaks Siula Grande (6,344 m /20,813 ft) and Yerupajá (6,635 m /21,768 ft) came into view. Yerupajá is the highest peak in the Peruvian Andes outside the Cordillera Blanca.
From Carhuac Pass to Laguna Carhuacocha
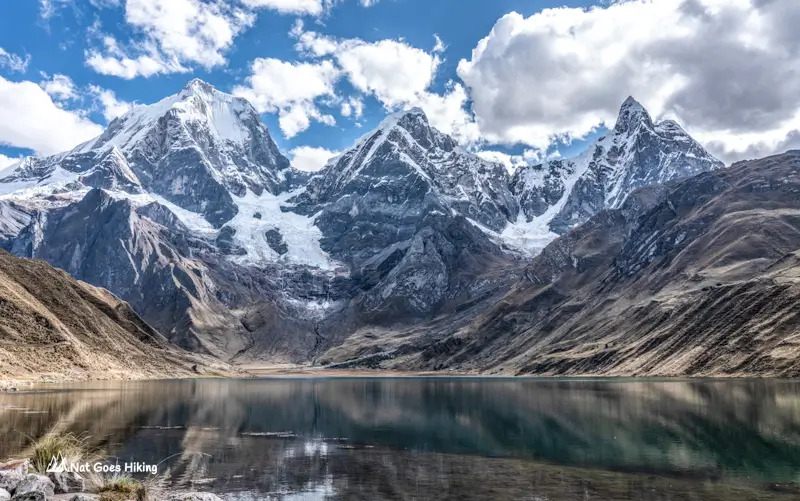
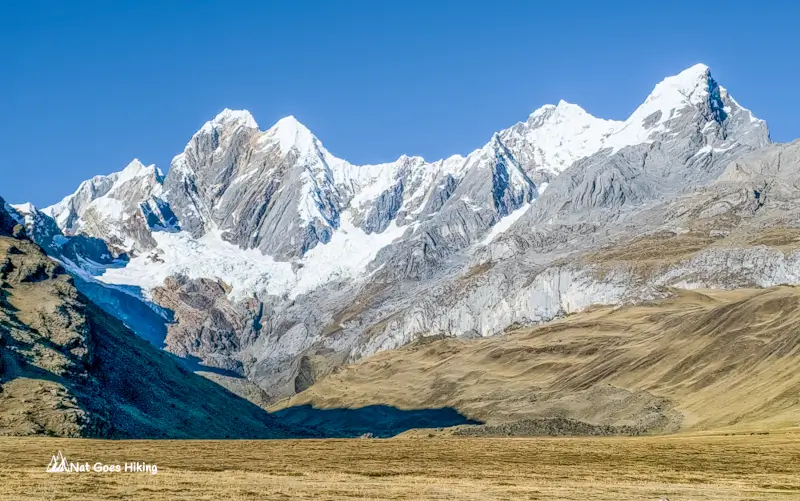
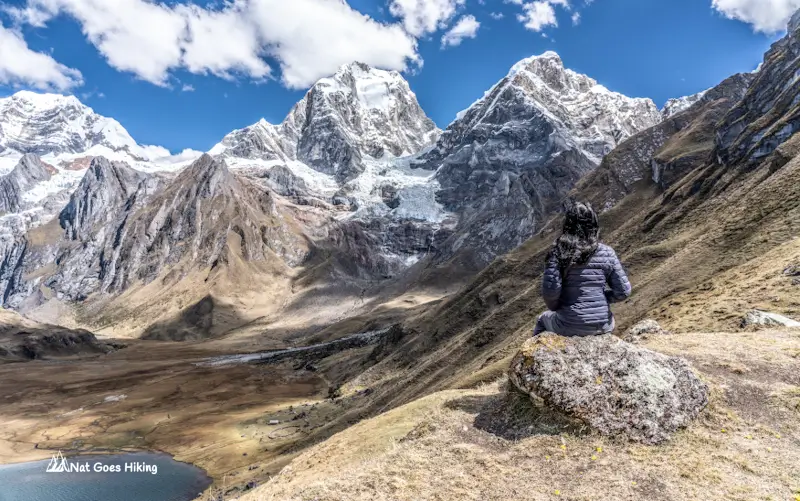
From the pass, it’s about 3.5 km /2.2 mi (around 1 hour 10 minutes) to the lookout over Laguna Carhuacocha. We spent about 40 minutes enjoying the amazing view. You’re looking straight over the lagoon, with Siula Grande, Yerupajá, and Jirishanca towering above it. It’s the kind of view that makes you stop and just sit for a while.
From the lookout, it’s another 1.7 km / 1 mi (around 30 minutes) down to Carhuacocha Camp. Just before reaching camp, there’s a small shop selling basic drinks. We grabbed a small Coca-Cola for S/10.
Staying at Laguna Carhuacocha Camp
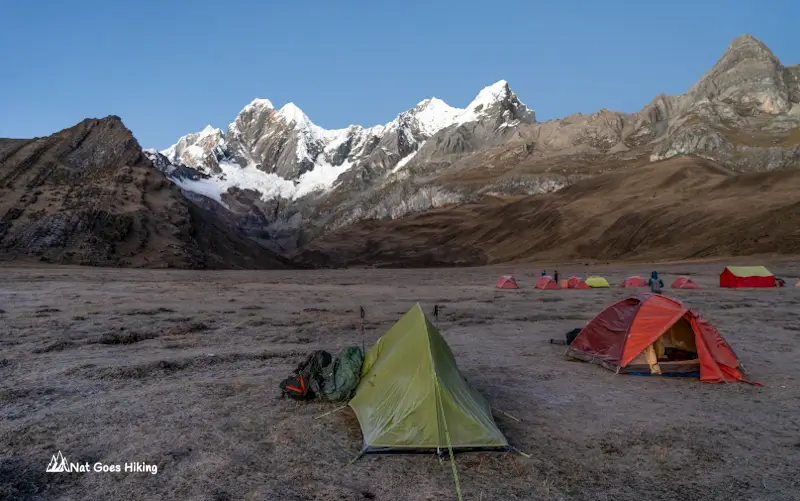
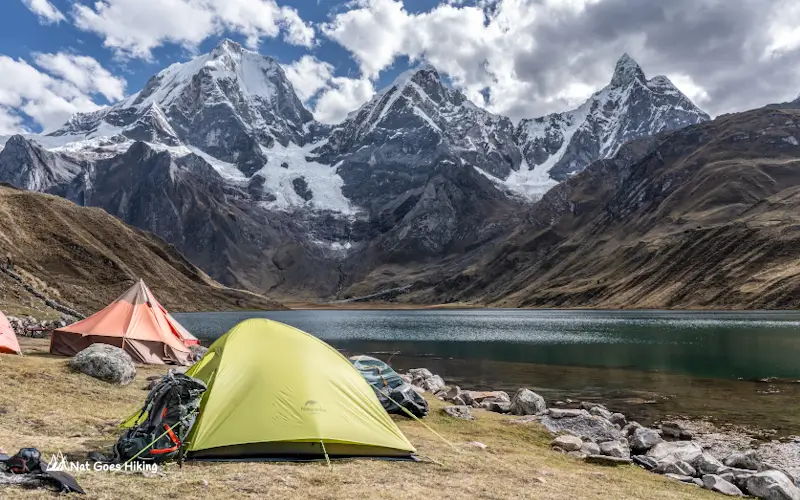
We chose to camp on the opposite side of the lagoon. Most of the organised groups stayed on the main side, so our spot was much quieter with only a few tents around.
This was easily one of the most stunning campsites I’ve ever stayed at. You’ve got Laguna Carhuacocha right in front of you, with close-up views of Yerupajá, Siula Grande, and Jirishanca. It’s also one of the most iconic views on the Huayhuash Trek, and it completely lived up to the hype.
In total, the day took us about 5 hours 20 minutes, including all breaks and time at the lookout. We reached camp around 1:45 pm, set up the tent right by the shore, and settled in for lunch.
While we were eating, a cobrador came around to collect the community fee (S/30 per person).
Day 3: Laguna Carhuacocha to Huayhuash Camp via Tres Lagunas and Siula Pass
Mini Huayhuash Trek Day 3 Overview
- Route: Laguna Carhuacocha – Tres Lagunas – Camp Huayhuash
- Elevation gain: 800 m / 2,625 ft
- Starting elevation: Laguna Carhuacocha 4,150 m / 13,615 ft
- Lowest point: Laguna Carhuacocha 4,150 m / 13,615 ft
- Distance: 14.4 km / 8.95 miles
- Elevation loss: 480 m / 1,575 ft
- Ending elevation: Huayhuash Camp 4,350 m / 14,272 ft
- Highest point: Siula Pass 4,830 m / 15,846 ft
This is often considered the most beautiful day on both the mini Huayhuash Trek and the classic Huayhuash Trek. Honestly, it lived up to the hype; the views were next level.
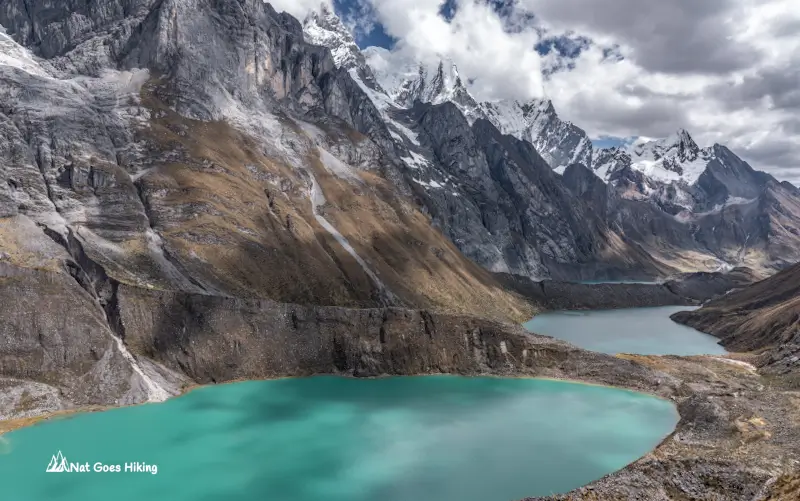
Hiking to Tres Lagunas
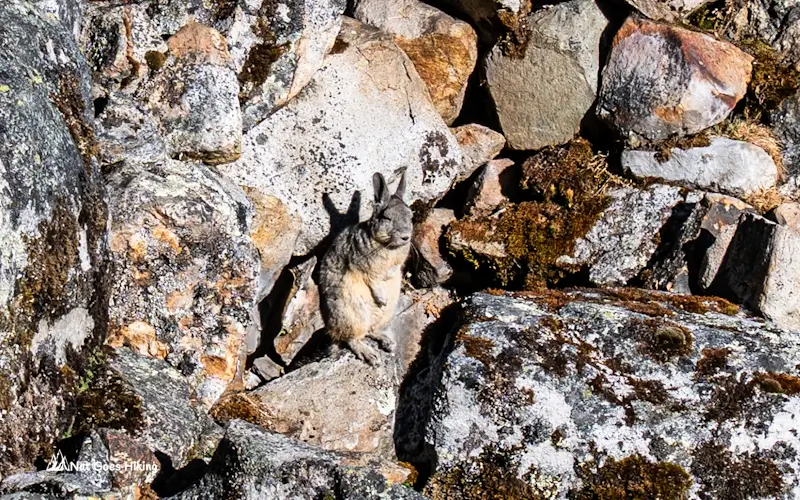
We started hiking at 7:10 am, heading towards the famous Tres Lagunas. Not long after leaving camp, we spotted a few viscachas sunbathing on the rocks.
The first lake, Laguna Gangrajanca, is about 3 km /1.9 mi from camp with only ~130 m /426 ft of elevation gain. The trail stayed fairly flat as we passed Laguna Siulacocha. The views are mindblowing: bright blue lagoons with close-up views of snow-capped peaks. From time to time, we could see avalanches.
Once we reached Laguna Quesillacocha, things changed quickly. The trail turns steep and stays that way all the way up to Siula Pass. It’s a proper climb.
We continued up towards the Tres Lagunas lookout. In total, it took us almost 4 hours from camp, with around 500 m / 1,640 ft of elevation gain.
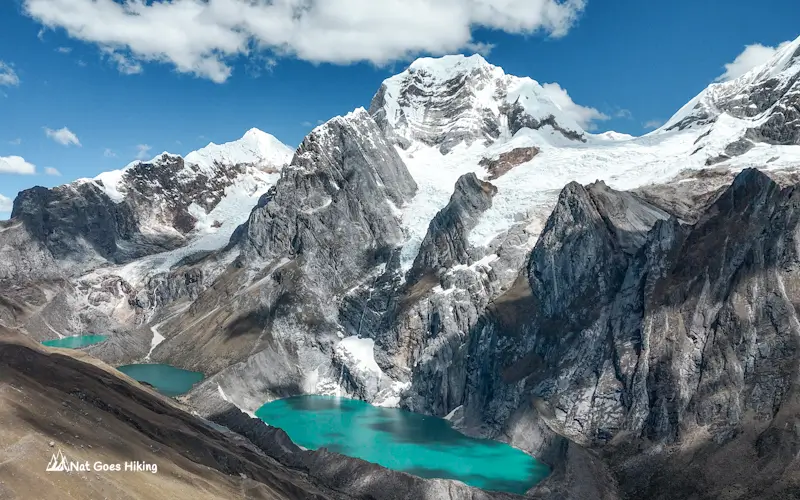
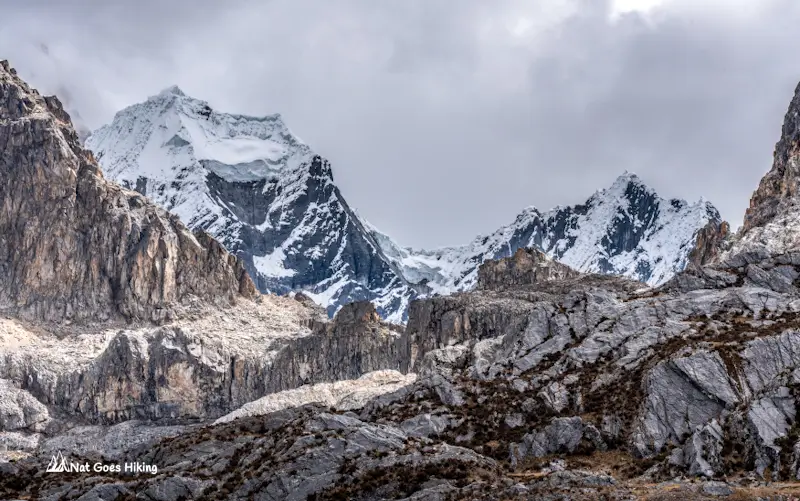
Tres Lagunas Lookout
Tres Lagunas lookout is one of the most iconic viewpoints on the Huayhuash trek, and it’s easy to see why.
From the lookout, you’re surrounded by jagged peaks and a chain of deep blue lakes below. We took a long break here, about an hour, just soaking it all in, taking photos, and having snacks.
Further Climb to Siula Pass
From there, we pushed on to Siula Pass (4,830 m /15,846 ft). It’s another hour from the lookout, with about 300 m of elevation gain. The climb is steep, but the views keep getting better.

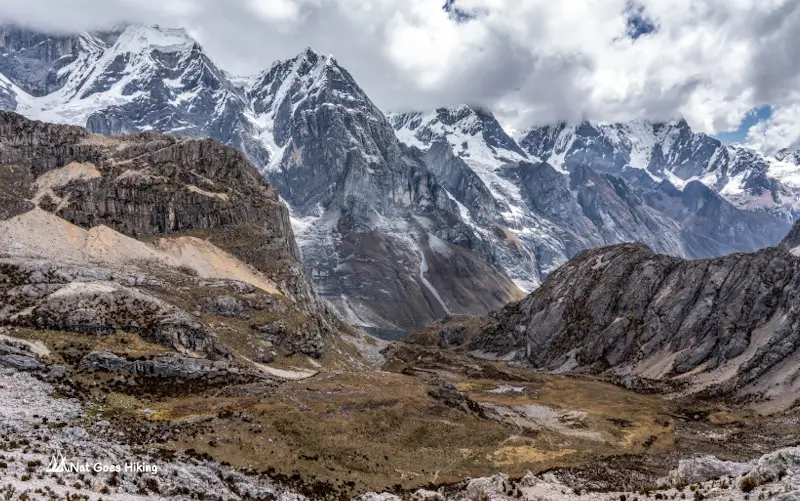
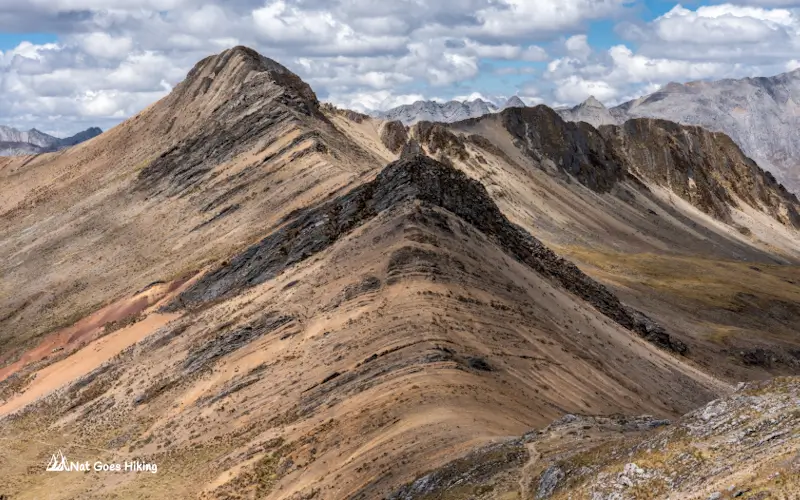
At the top, more breathtaking panoramic views. Looking back, you can see the trail winding through a rocky valley, opening up to a dramatic wall of peaks in the Cordillera Huayhuash. On the other side, it’s a totally different landscape: bare, layered ridgelines, a wide open valley, a small lake, and the gleaming white summit in the distance.
Descent to Huayhuash Camp
After a quick 15-minute break at the pass, we started the long descent towards Huayhuash Camp. From here, it’s downhill all the way.
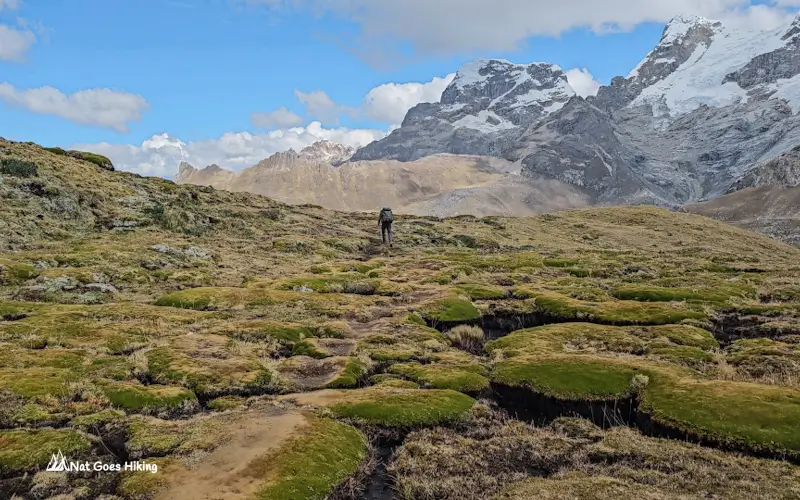
As we descended, the scenery kept shifting. On one side, we had sweeping views of the Cordillera Huayhuash; on the other, dark, barren ridges. Lower down, we entered a grassy valley and then crossed high-altitude wetlands, which looked like lush, dense spongy cushions of moss and grass. These cushions are separated by channels of dark, muddy peat, so for a while we were hopping from one cushion to another.
In total, we were on the trail for about 8 hours 20 minutes, including all breaks, and reached Huayhuash Camp around 3:30 pm. The community fee here was S/30 per person.
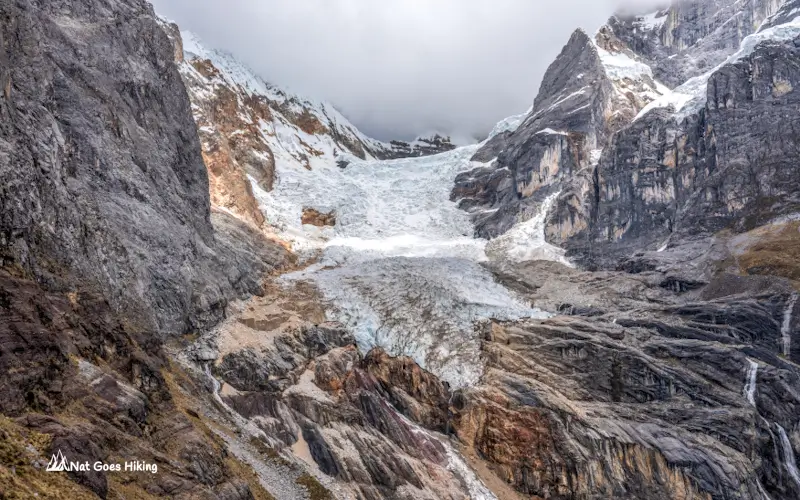
A Rough Night at Huayhuash Camp
By the time we arrived, clouds were rolling in. Shortly after setting up the tent, it started raining, eventually turning into hail.
To make things worse, my partner got sick. Headache, fever, stomach issues, all at once. Whether it was altitude or something else, it wasn’t a good idea to push further to finish the full Huayhuash Trek. It’s just another reminder not to underestimate the altitude. Even though we had already spent time at altitude and completed other hikes, its effects can still hit unexpectedly.
We figured out that we could get off the trail and get to a small settlement of Tupac Amaru.
Day 4: Camp Huayhuash – Tupac Amaru
Mini Huayhuash Trek Day 4 Overview
- Route: Camp Huayhuash – Tupac Amaru
- Elevation gain: 80 m / 262 ft
- Starting elevation: Huayhuash Camp 4,350 m / 14,272 ft
- Lowest point: Tupac Amaru 3,963 m / 13,002 ft
- Distance: 7.5 km / 4.66 miles
- Elevation loss: 470 m / 1,542 ft
- Ending elevation: Tupac Amaru 3,963 m / 13,002 ft
- Highest point: 4,430 m / 14,534 ft
Strictly speaking, this section isn’t part of the classic Huayhuash Trek, but for us, it became part of the experience.
From Huayhuash Camp to Tupac Amaru, it’s about 7.5 km /4.7 mi, mostly downhill, with around 470 m /1,542 ft of elevation loss.
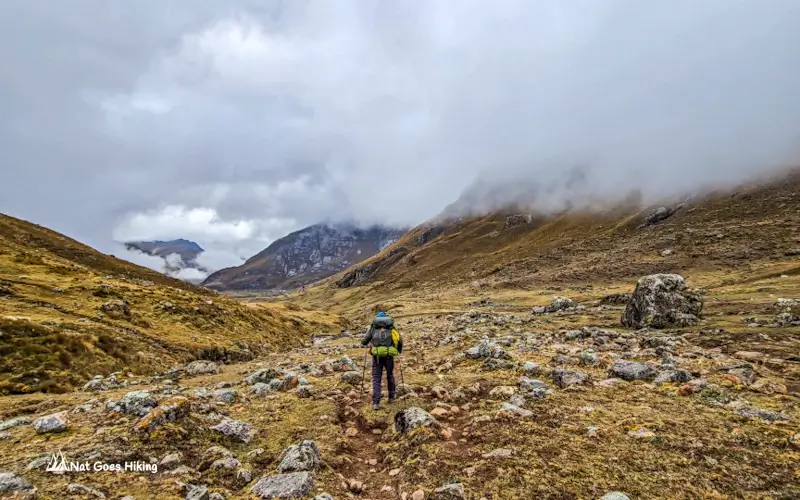
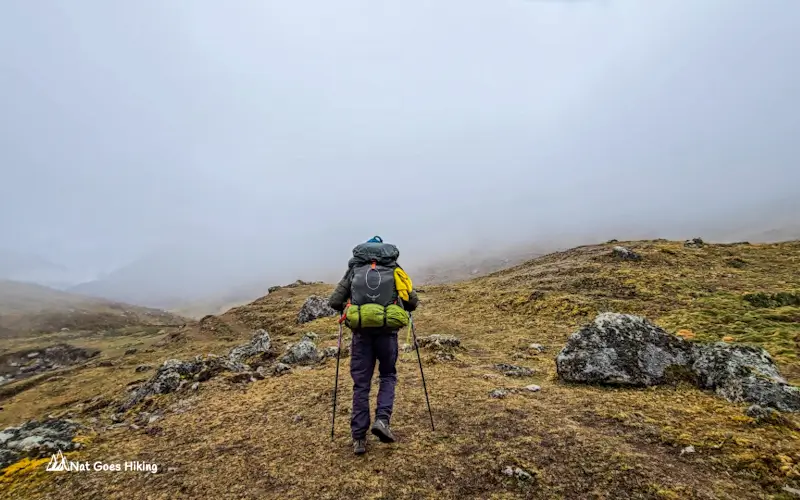
We left camp at 8:20 am. It was drizzling, and low clouds were covering the mountains, so the views felt completely different from the previous day.
The trail follows the Huayhuash River, and we had to cross it once. The route to Tupac Amaru is fairly straightforward and easy to follow.
One of the guides told us we could either find basic accommodation in Tupac Amaru or catch a colectivo to Baños, but there was still a fair bit of uncertainty about what we’d actually find at the end of the trail.
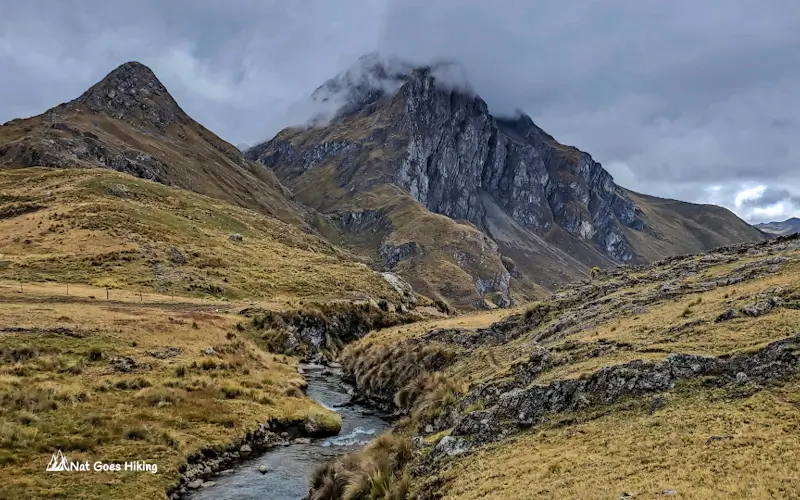
Even though this section isn’t part of the main Huayhuash circuit, it still feels very scenic. We walked through a wide high-altitude valley, surrounded by ridgelines, with clouds rolling over the peaks.
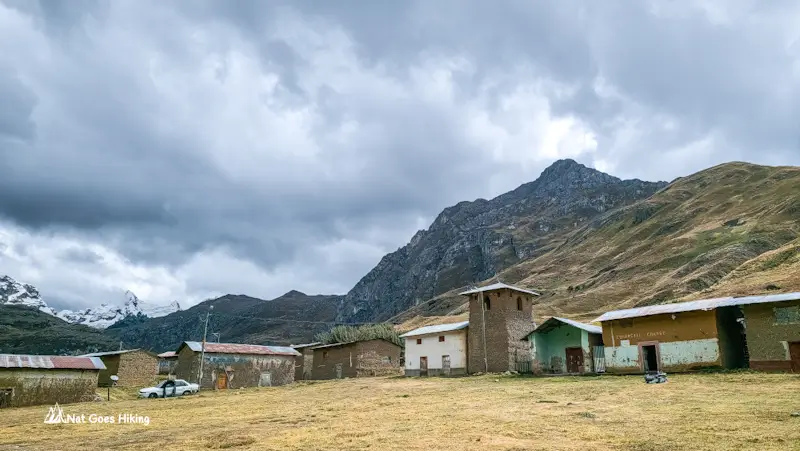
It took us about 3 hours to reach Tupac Amaru. There isn’t much infrastructure there. It’s a small rural settlement rather than a proper village, and we didn’t see any hostels or guesthouses.
How to get from Tupac Amaru back to Huaraz
Step 1. Getting from Tupac Amaru to Baños
Once we arrived in Tupac Amaru, a few locals approached us offering taxi rides to Baños, the nearest town. Prices started at S/300 and dropped to around S/200 as we got closer to the main plaza.
What threw us off was the information we were getting. Several people insisted there were no colectivos leaving from Tupac Amaru, which didn’t feel quite right.
Then one lady, who also offered us hot coca tea, told us there indeed was a colectivo from the main plaza, usually leaving around 12–1 pm.
We decided to wait. In the end, a colectivo showed up around 12:30 pm. We jumped in, a few more locals joined, and we set off straight away.
The drive to Baños was incredibly scenic. It’s about 32 km from Tupac Amaru, and the journey took about an hour and a half. It cost us S/15 per person.
We decided to stay in Baños to get rest and recover. We checked into a hotel at Plaza de Armas for S/35 per night.
Step 2. Getting from Baños to La Union
There’s no direct public transport from Baños to Huaraz, so the first step is getting to La Unión.
We asked our hotel owner about colectivos to La Unión, and he organised a spot for us. They usually leave early in the morning. Ours departed around 5 am from the Plaza de Armas.
La Unión is only about 40 km away, but the drive took around 2 hours. The fare was S/20 per person.
The ride itself was an experience. The car was completely packed. It was an old, small vehicle, but somehow they fit four people in the back seat, two in the front passenger seat, and even two in the cargo area.
Step 3. Getting from La Union to Huaraz
When we arrived in La Unión, the driver dropped us near the colectivos heading to Huaraz.
We briefly considered checking the bus terminal, but the drivers convinced us to take a colectivo instead. They said the next bus wouldn’t leave for a few hours and would take longer anyway, so the colectivo made more sense.
We paid S/35 per person. The car filled up quickly, and we were on the road within 10–15 minutes.
The drive to Huaraz took about 4.5 hours, and we arrived around midday. Compared to the previous leg, this ride felt much more comfortable; the car was newer and in good condition.
Mini Huayhuash Trek without a guide
Both the Mini Huayhuash Trek and the classic Huayhuash Trek can be done independently without a guide. There’s currently no permit requirement or mandatory guide system.
If you have:
- solid multi-day hiking experience
- some acclimatisation to altitude
- confidence navigating in remote mountain environments
- and a decent fitness level
then hiking independently is absolutely possible.
What makes the Mini Huayhuash Trek easier to do independently?
That said, the Mini Huayhuash Trek is far more manageable as a self-guided trek than the full Huayhuash Circuit.
Compared to the classic Huayhuash Circuit, the biggest advantage is the shorter duration. Because the trek only takes around 4 days, your backpack stays much lighter since you don’t need to carry food and supplies for 8–10 days.
Besides, there are fewer days exposed to the weather and altitude, and the shorter distances make the trek less physically demanding.
However, independent trekking in Huayhuash still comes with challenges:
- high altitude (passes above 4,600–4,800 m)
- freezing nights
- remote campsites with limited infrastructure
- unpredictable mountain weather
- and transport logistics that can feel chaotic at times
Is it worth doing Huayhuash without a tour?
For experienced hikers, definitely.
Independent trekking is significantly cheaper than joining a guided tour and gives you much more flexibility with pacing, campsites, and daily timing.
But guided tours also remove most of the stress:
- transport is organised
- meals are prepared
- camping equipment is carried or set up
- you only need to carry personal items for the day
So the decision really comes down to what kind of experience you want:
- pay for more comfort
- or more freedom and independence.
Mini Huayhuash Trek without a guide: Cost Breakdown
Our real cost: Mini Huayhuash Trek without a tour
Below is a full breakdown of what we actually spent completing the 4-Day Mini Huayhuash Trek independently. Our total came to S/506.65 (US$149.5) including community fees.
Cost Breakdown: Mini Huayhuash Trek without a tour (2 people)
🚐 Transportation
- Transport from Huaraz to Quartelhuain: S/100 × 2 = S/200 (US$59.0)
- Colectivo from Tupac Amaru to Baños: S/15 × 2 = S/30 (US$8.9)
- Colectivo from Baños to La Unión: S/20 × 2 = S/40 (US$11.8)
- Colectivo from La Unión to Huaraz: S/35 × 2 = S/70 (US$20.6)
🏨 Accommodation
- Hotel in Baños: S/35 (US$10.3)
🍜 Food
- Freeze-dried hiking food (3 packs): AUD 20 × 3 = AUD 60 = S/131.19 (US$38.7)
- Peanut butter 200g: S/11.30 (US$3.3)
- Nut & fruit mix: S/11.60 × 6 = S/69.60 (US$20.5)
- Canned tuna: S/5.50 × 3 = S/16.50 (US$4.9)
- Instant noodles: S/2.70 × 6 = S/16.20 (US$4.8)
- Chocolate: S/10.00 (US$2.9)
- Gummy bears: S/2.40 (US$0.7)
- Crackers: S/3.80 × 2 = S/7.60 (US$2.2)
- Coca tea: S/2.50 (US$0.7)
- Lunch in Baños: S/8 × 2 = S/16.00 (US$4.7)
- Bread & avocado: S/5.00 (US$1.5)
- Water: S/5 × 2 = S/10.00 (US$2.9)
🏘️ Community Fees
- Comunidad de Llamac (paid in Llamac): S/50 × 2 = S/100 (US$29.5)
- Comunidad de Pocpa (paid in Pocpa): S/20 × 2 = S/40 (US$11.8)
- Comunidad de Queropalca (paid at Laguna Janca camp): S/40 × 2 = S/80 (US$23.6)
- Comunidad Quishuarcancha (paid at Laguna Carhuacocha camp): S/30 × 2 = S/60 (US$17.7)
- Comunidad de Tupac Amaru (paid at Huayhuash camp): S/30 × 2 = S/60 (US$17.7)
To make a fair comparison with tour prices, it’s important to understand one key detail: most guided tours do not include community fees, which are still paid separately in cash along the trail.
Excluding these fees, our actual trekking costs came to $198.6 for two people, or US$99.3 per person.
Mini Huayhuash Trek: Self-guided vs Tour Prices
I found this guided 4-day Mini Huayhuash Trek for $365 per person (excluding community fees), with exactly the same itinerary as ours. That’s roughly three times more expensive than trekking independently.
International booking platforms like GetYourGuide and Viator list mini Huayhuash Treks with different itineraries, ranging from around $580 to $800 per person.
What are you actually paying for on a tour?
Clearly, the self-guided mini Huayhuash Trek turned out significantly cheaper than buying a tour. But it’s also important to remember that a guided mini Huayhuash Trek, just like any guided trek in Peru, is not just about transport or food; you are paying for comfort, logistics, and simplicity in a remote environment.
On a guided tour:
- All camping logistics are handled for you
- Campsites are arranged in advance
- Tents are provided and set up for you
- All meals are prepared
- Transport is organised
- You don’t need to worry about navigation or timing.
In short: you only carry your daypack and walk. Everything else is taken care of.
So the difference is not just the costs, but also the experience. If you want comfort and zero logistics stress, go with a tour.
If you prefer freedom and lower costs, and at the same time are an experienced hiker confident in navigating remote mountainous terrain, you can go independently.

Navigation on the Mini Huayhuash Trek
The Huayhuash Trek is mostly unmarked. On the short version of the trek, the only sign I remember seeing was at Siula Pass.
That said, we found the main trail fairly manageable most of the time. The paths on the Mini Huayhuash Trek are generally visible and well-trodden
But also keep in mind that there are countless side trails, livestock paths, and alternative alpine routes branching off the main track. Some of these higher routes are more physically demanding, but they also come with even better views. In boggy valleys or rocky sections, the trail can suddenly fade or split into multiple paths.
Weather can also change everything. The trail can become difficult to follow in fog, snow, or heavy rain. For example, on Day 4, it was drizzling, and low clouds covered the mountains, making visibility on the trail to Trapecio Pass very poor due to thick fog. You have to be prepared for situations like this and be confident in navigating remote mountain environments.
Also, for remote treks, it’s best not to rely on a single navigation method.
Download Offline Maps Before the Trek
Apps like AllTrails, Maps.me, and Gaia GPS allow you to download maps for offline use before heading into the mountains, where there is no mobile signal.
We usually use AllTrails as a backup. On AllTrails, offline map downloads are available with a paid subscription. Below are the AllTrails routes we used for our Mini Huayhuash Trek itinerary:
We had AllTrails with offline maps as a backup. On AllTrails, offline map downloads are available with a paid subscription. Below are links to the relevant trails on AllTrails:
- Cordillera Huayhuash Complete Trek
- Day 1: Quartelhuain → Janca Camp
- Day 2: Janca Camp → Laguna Carhuacocha
- Day 3: Carhuacocha → Huayhuash Camp
- Day 4: Huayhuash Camp → Tupac Amaru (reverse direction)
Don’t rely entirely on apps. Phone batteries drain quickly, especially in cold weather. Make sure to bring a power bank and, ideally, a backup device. We carried two phones with AllTrails and Mapy.com installed.
Bring a GPS device
You can download GPX tracks from platforms like Wikiloc and upload them directly to GPS devices such as Garmin.
We used a Garmin GPS device as our main navigation tool and checked the route occasionally against offline maps on AllTrails. We used this GPX route from Wikiloc, which covers the full Huayhuash Circuit.
Our device also had an InReach satellite communication feature, which is something I’d strongly recommend for remote treks like the Huayhuash.
Practical information for the Mini Huayhuash Trek
Water sources on the Mini Huayhuash Trek
There are plenty of water sources along the Mini Huayhuash Trek. And all official campsites had water access. On the short version of the Huayhuash Trek: at Janca Camp, Laguna Carhuacocha Camp, and Huayhuash Camp, there were nearby rivers as well as water taps fed either from the mountains or directly from the river.
That said, don’t automatically assume the water is clean. At our first campsite, Janca Camp, we noticed rubbish in the river, including plastic packaging and animal bones. One of the guides told us that some irresponsible tour operators dump waste there, which was disappointing to see in such a beautiful place.
There are also plenty of animals in the area, so treating your water is a must.
Whenever you have the option, fill up from a tap rather than the river. Most of the time, tap water comes from the mountains and tends to be cleaner. To be safe, filter and boil water. We filtered our water before drinking it. Boiling it is even safer if you have enough time and fuel.
Tip: overnight temperatures drop below 0°C. During our trek, the pipes froze overnight, which meant there was no running water in the morning. So it’s smart to fill up all your water bottles the evening before.
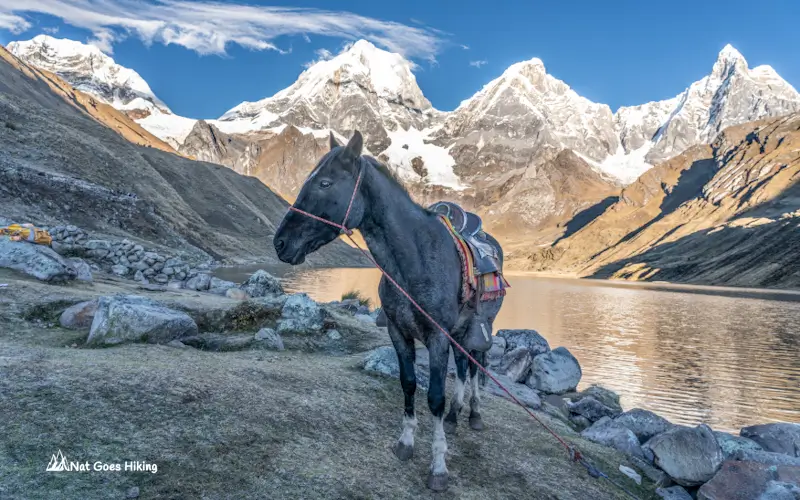
Hiring Mules on the Huayhuash Trek
One thing to know before doing the mini Huayhuash Trek is that there are basically no proper resupply points along the route. On the full Huayhuash Circuit, Huayllapa is the only village where you can restock food and supplies. Outside of that, you really need to carry everything with you.
That said, the mini version is a bit easier. You don’t need as much food, so carrying your pack is more manageable.
So what about mules and gear transport? We didn’t pre-book anything in advance, but we learned that it is possible to arrange mule support for the Huayhuash trek in a few different ways:
- through local agencies in Huaraz
- via villages like Llamac
- or sometimes directly on the trail with trekking group guides.
If you are considering finding local muleteers in Llamac or directly on the trail, it’s not something you can fully rely on, though.
But we arranged for one of our backpacks to be carried and paid S/50 for it. Make sure you talk to a guide, not a muleteer, directly.
Still, I wouldn’t plan your trek around mule support. Think of it as a bonus option rather than part of your strategy.
For more inspiration on hikes near Huaraz, check out my guide to the Best Hikes Near Huaraz.
Mini Huayhuash Trek FAQ
The best time to hike the Mini Huayhuash Trek is during the dry season from May to September, when weather conditions are generally more stable, and mountain views are clearer. June to August are the most popular months. However, weather in the Huayhuash Range can change quickly at any time of year, so it’s important to be prepared for rain, wind, hail, or even snow, even during the dry season. When we were preparing for the trek in June 2025, the forecast still showed quite a few rainy days. During our hike in July, the first two days were sunny, but by the end of Day 3 it started raining and hailing, followed by drizzle the next day.
The Mini Huayhuash Trek is generally considered moderate to challenging due to the high altitude, steep mountain passes, and remote camping conditions. However, it is far more manageable than the full Huayhuash Circuit because it only takes around 4 days and requires carrying fewer supplies. Shorter distances and fewer days exposed to altitude and weather also make it less physically demanding. Still, hikers should be prepared for freezing nights, unpredictable mountain weather, and passes above 4,600–4,800 m.
On our route of the Mini Huayhuash Trek, the highest point was Siula Pass at 4,830 m / 15,846 ft.
We stayed at three official campsites along the Mini Huayhuash Trek (Janca Camp, Laguna Carhuacocha, and Huayhuash Camp), and all of them had basic toilet facilities and water taps.
There are plenty of water sources along the Mini Huayhuash Trek, and the official campsites on our route (Janca Camp, Laguna Carhuacocha, and Huayhuash Camp) had access to nearby rivers or taps fed from mountain streams. However, you should always treat the water before drinking due to livestock and wildlife in the area. We filtered our water, and boiling is even safer if you have enough fuel and time.
More Posts on Peru and Bolivia
Want more inspiration for travel in Peru and Bolivia? Check out these posts:
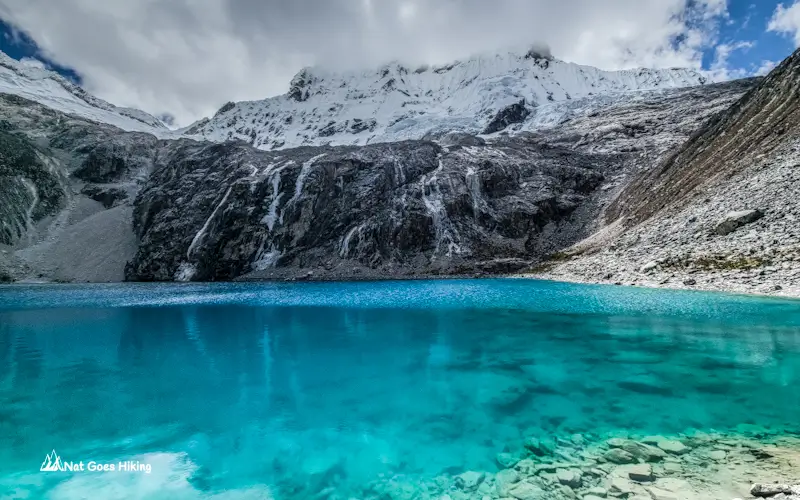
I hiked the Laguna 69 Hike in July 2025. Here’s what the photos don’t show: trail conditions, crowd levels, new 2026 access rules, costs, and more.
Want to hike to Machu Picchu without a guide? Choquequirao Trek is a great alternative to the Inca Trail. Learn everything you need here.
The Salkantay Trek is one of Peru’s best alternatives to the Inca Trail. In this guide, I break down each day on the trail, costs, difficulty, packing tips, and what it’s really like from my own experience hiking it.
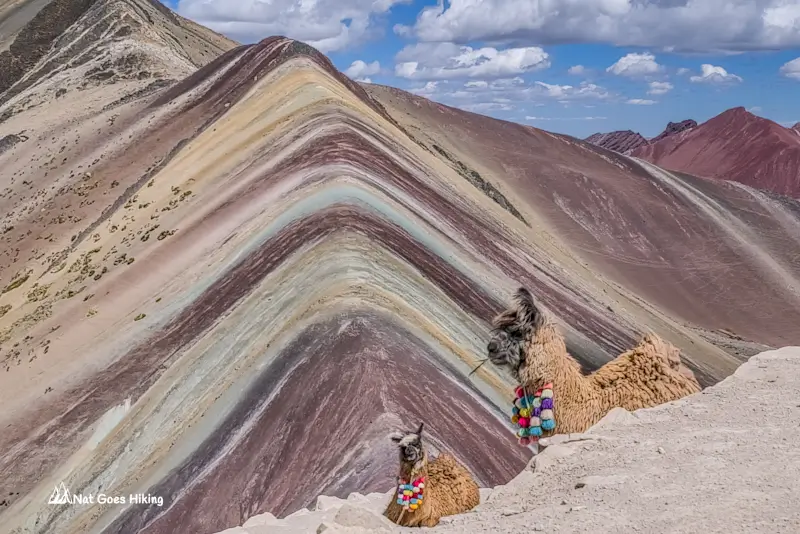
Planning to visit Vinicunca Rainbow Mountain? Here’s how I avoided the crowds at Rainbow Mountain, plus tips on going independently from Cusco.

Looking for a quieter alternative to Vinicunca? Palccoyo offers multiple rainbow mountains, easier hiking, and far fewer crowds. Read my complete guide on how to visit without a tour.
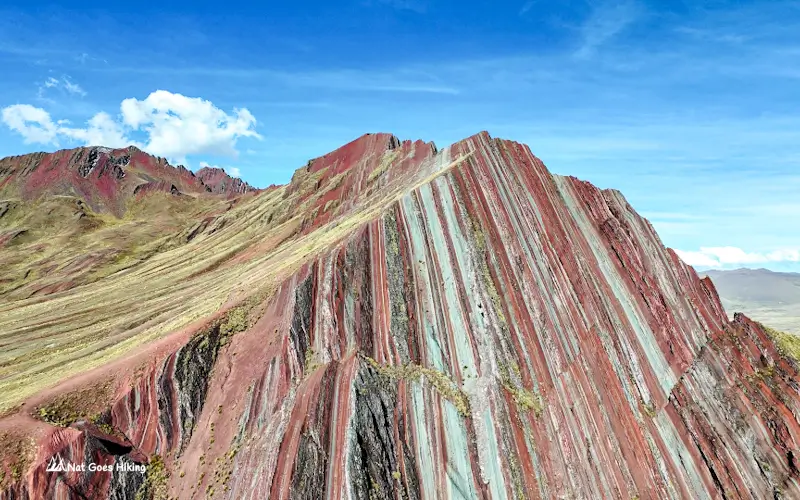
Want more inspiration for travel in Peru? Discover Pallay Punchu, an off‑the‑beaten‑path alternative to Rainbow Mountain you can visit without a guide.
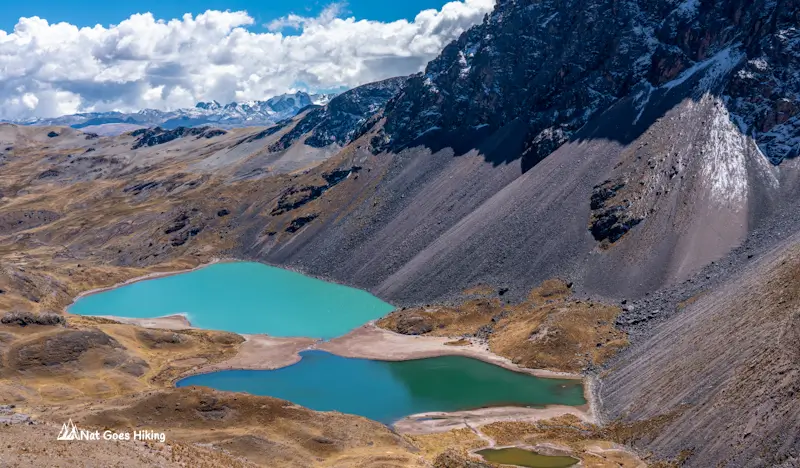
Seven colourful glacial lakes, views of Ausangate, alpacas roaming the valleys, and hot springs at the finish. We share our experience, costs, transport tips, and whether it’s worth doing without a tour.
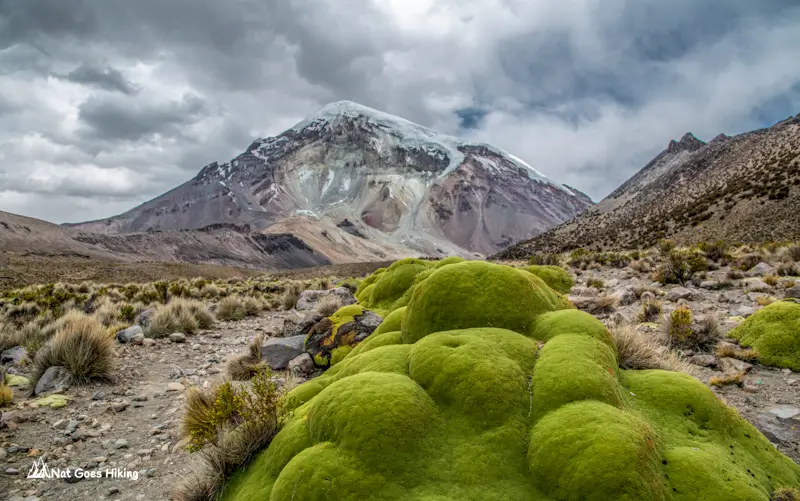
Sajama National Park is Bolivia’s hidden gem. This travel guide covers what to do, how to get there, where to stay, and useful tips from our experience.
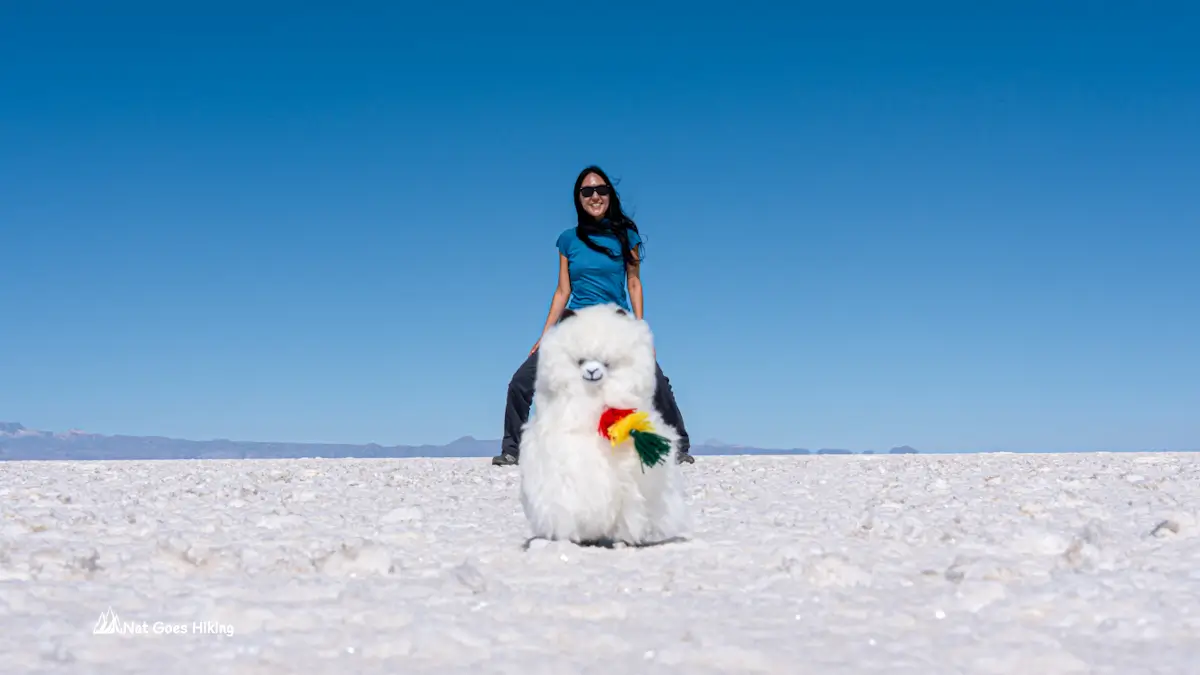
Planning a trip to Salar de Uyuni? Discover what to expect, the best time to visit, and whether to go independently or join a tour..

Although Bolivia is one of the most underrated countries, it has so much to offer. Wondering what the top things to do in Bolivia are?