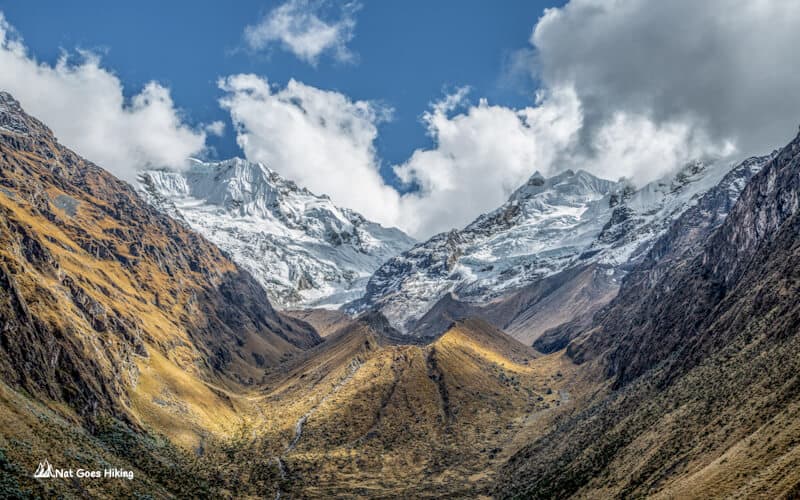
The Salkantay Trek is one of Peru’s most stunning alternative routes to the iconic Machu Picchu. It takes you past Humantay Lake, Salkantay Pass, snow-capped peaks, lush cloud forest and waterfalls, offering constantly changing scenery along the way.
I did the Salkantay Trek in June 2025, and based on my experience, I’ve put together this complete guide. You’ll find everything you need to plan your journey, including the route, difficulty, costs, packing list, and what to expect each day on the trek. Whether you’re comparing it to the Inca Trail or planning your first multi-day hike in the Andes, this guide will help you prepare.
Salkantay Trek Overview
Salkantay Trek Quick Facts
- Trail type: Point-to-point / Multi-day trek
- Total distance: 78 km / 48.5 miles
- Duration: 5–6 days
- Starting point: Challacancha 3,680 m / 12,073 ft or Soraypampa 3,840 m / 12,598 ft
- Ending point: Machu Picchu 2,384 m / 7,822 ft
- Elevation gain: 2,992 m / 9,816 ft
- Elevation loss: 3,422 m / 11,227 ft
- Highest point: Salkantay Pass 4,630 m / 15,190 ft
- Lowest point: Hidroelectrica 1,790 m / 5,873 ft
- Difficulty: Moderate to challenging / high altitude
- Best season: Dry season (May-September)
- Accommodation: Guesthouses, lodges, campsites available along the route
- Highlights: Laguna Humantay, Salkantay Pass, cloud forest, coffee farms
- Trail marking: Clear marking
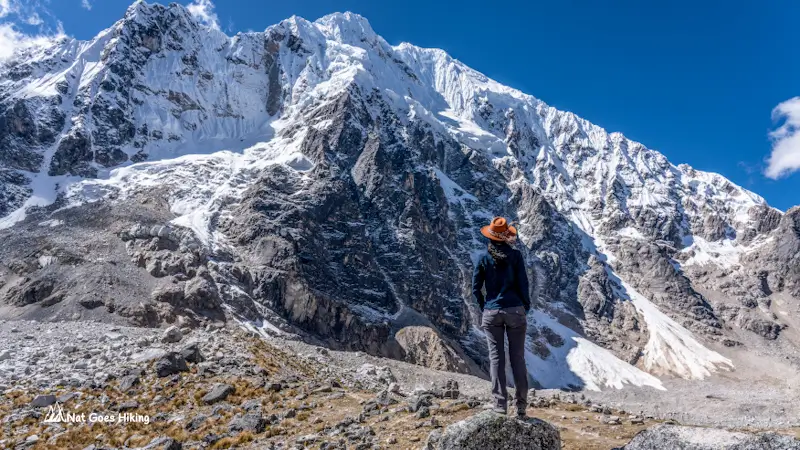
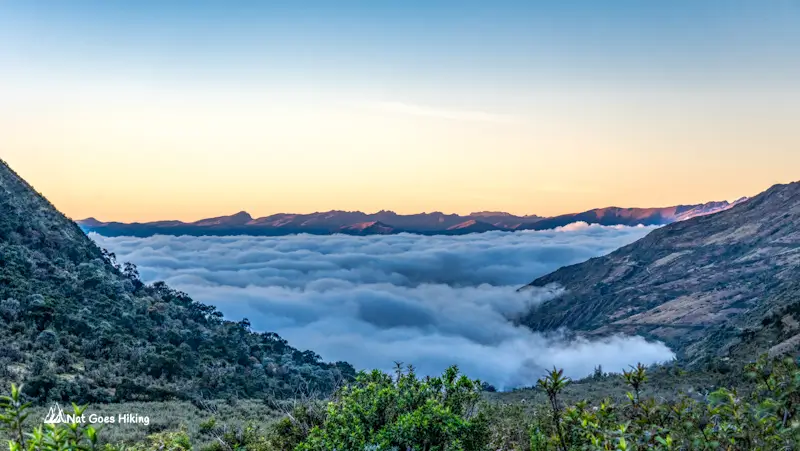
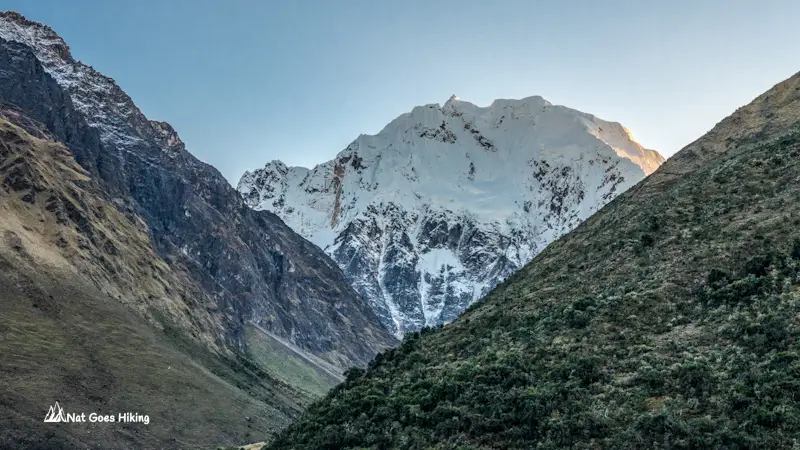
If you’re looking for an alternative to the famous Inca Trail, the Salkantay Trek, which finishes in Machu Picchu, is easily one of the best options. What makes it special is the variety. One day you’re walking through icy mountain landscapes below Nevado Salkantay (6,271 m / 20,574 ft), the next you’re in a humid cloud forest surrounded by orchids and waterfalls. Few treks in South America offer that kind of contrast in just 4–5 days.
Most people do the trek in 4 or 5 days, covering roughly 70–78 km / 43.5-48.5 mi depending on the route. It usually starts near Challacancha or Soraypampa, located 106 and 113 km from Cusco, and ends in Machu Picchu via Aguas Calientes. Along the way, you’ll pass highlights like Humantay Lake (Laguna Humantay), Salkantay Pass, and the Santa Teresa region.
Salkantay Trek vs Inca Trail
If you’re planning a trek to Machu Picchu, you’ve probably come across three main routes: the famous Inca Trail, the Salkantay Trek, and the Choquequirao Trek. I looked into all of them before my trip and hiked both the Salkantay and the Choquequirao, but not the Inca Trail.
Here’s a clear breakdown to help you decide.
The biggest difference – How you enter Machu Picchu
This is very important: the Inca Trail is the only trek that enters Machu Picchu through the Sun Gate (Inti Punku). That sunrise moment is probably a lifetime experience. If this is important for you, then your choice is definitely the Inca Trail.
On the Salkantay Trek and the Choquequirao Trek, you’ll arrive via the town of Aguas Calientes, where everyone arrives before visiting Machu Picchu.
Salkantay Trek Advantages
No permit or guide required
The Inca Trail has strict daily limits and often sells out months in advance. With the Salkantay Trek, there are no permits required. You can book last-minute, which is perfect if you’re not planning your life 6 months ahead.
Besides, if you prefer independent hiking, the Salkantay Trek is easily done without a guide. Hiking without a guide is also more affordable.
Landscape diversity
The Salkantay Trek takes you through a much wider variety of landscapes: from snow-capped mountains and high-altitude passes to lush cloud forests.
When to choose the Inca Trail
Choose the Inca Trail if you:
- want that classic, historic route
- dream of entering Machu Picchu through the Sun Gate
- don’t mind booking early and paying more
What about the Choquequirao Trek?
The Choquequirao Trek takes you to Choquequirao, often called the “sister city” of Machu Picchu.
This trek is longer (about 9 days) and tougher, and has fewer people. Same as with the Salkantay Trek, it doesn’t require a permit and can be done independently, and it has similar landscape diversity.
Having done both treks, I can confirm that the Choquequirao Trek is the most challenging of the three. It takes 8 to 10 days and covers around 131 km (82 mi). The total elevation gain is 8,020 m (26,070 ft), which is significantly more than the Salkantay Trek’s 2,992 m (9,816 ft).
Inca Trail vs Salkantay Trek vs Choquequirao Trek
| Classic Inca Trail | Salkantay Trek | Choquequirao Trek |
|---|---|---|
| Biggest advantage ⭐Entering Machu Picchu via Sun Gate | Biggest advantage ⭐Hiking light from lodge to lodge without camping gear | Biggest advantage ⭐No crowds & visiting Choquequirao ruins |
| Entry to Machu PicchuVia Sun Gate (iconic entry) | Entry to Machu PicchuVia Aguas Calientes | Entry to Machu PicchuVia Aguas Calientes |
| PermitsRequired (book months ahead) | PermitsNo permits needed | PermitsNo permits needed |
| FlexibilityGuided tours only | FlexibilityGuided or independent | FlexibilityGuided or independent |
| Tour price in 2026$870 | Tour price in 2026$695 | Tour price in 2026$1,200-$1,300 |
| Distance44 km / 26.8 mi | Distance78 km / 48.5 mi | Distance131 km / 82 mi |
| Duration4 days | Duration5–6 days | Duration8–10 days |
| Elevation gain2,507 m / 8,225 ft | Elevation gain2,992 m / 9,816 ft | Elevation gain8,138 m / 26,457 ft |
| Elevation loss2,937 m / 9,635 ft | Elevation loss3,422 m / 11,227 ft | Elevation loss8,250 m / 27,067 ft |
| HighlightsSun Gate arrival, Inca ruins, Dead Woman’s Pass | HighlightsSalkantay Pass, Humantay Lake, diverse landscapes | HighlightsChoquequirao ruins, Pinchaunuyoc terraces, high passes |
| DifficultyModerate | DifficultyModerate to challenging | DifficultyChallenging |
| CrowdsHigh | CrowdsModerate | CrowdsLow |
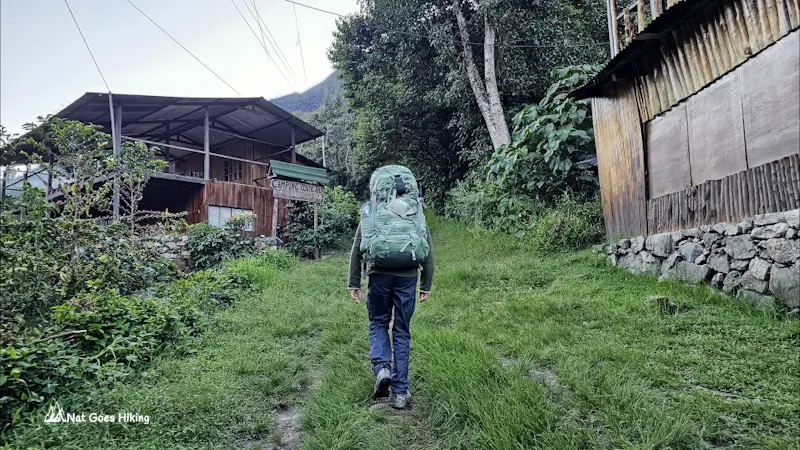
Salkantay Trek: Hiking without camping gear
You can hike the Salkantay Trek without camping gear. There are villages along the route, where you can find accommodation and buy cooked meals, which means you can hike light without carrying a heavy backpack.
We hiked with camping gear and used our tent only once at Wayramachay. Would we do it differently? Yes, we would hike light, staying in lodges and skipping staying in Wayramachay, as I believe it doesn’t have accommodation for independent hikers. We could only find a campground there. There is a hotel in Wayramachay, but they seem to be available only for tour groups.
Guesthouses are available in Soraypampa, Chaullay, Collpapampa, La Playa, Lucmabamba, Llactapata, and Aguas Calientes. We didn’t prebook anything, and it was easy to find guesthouses as we went.
You can buy snacks and drinks along the route, and at lodges, cooked meals are available, so you don’t have to carry food.
If I had a chance to do it all over again, I would hike light and stay in lodges, and follow this itinerary:
- Day 1. Trailhead – Soraypampa – Humantay Lake – Soraypampa, 8.8 km / 5.5 mi
- Day 2. Soraypampa – Salkantay Pass – Chaullay, 21.4 km / 13.3 mi
- Day 3. Chaullay – Lucmabamba, 20.2 km / 12.6 mi
- Day 4. Lucmabamba – Llactapata – Hydroelectrica – Aguas Calientes, 24.2 km /15 mi
- Day 5. Visit Machu Picchu from Aguas Calientes, 3.5 km / 2.17 mi

Salkantay Trek without a guide
The Salkantay Trek can easily be done without a guide. As mentioned above, unlike the Inca Trail, it doesn’t require a permit. Secondly, there are villages along the route where you can stay in lodges and buy meals. This means you don’t have to carry a heavy backpack with camping gear and food.
If you have multi-day hiking experience, are physically fit, and have navigation skills in mountainous terrain, you can absolutely hike the Salkantay Trek independently.
How to Get to the Salkantay Trek Trailhead
You can start the Salkantay Trek from Challacancha or Soraypampa. Starting at Challacancha adds 6.5-7 km /4-4.5 mi to the route. There is no direct public transport from Cusco to Challacancha or Soraypampa.
Option 1. Colectivo + Taxi
However, you can combine a colectivo (shared minivan) with a taxi.
First, take a colectivo from Cusco to Mollepata. The bus stop is here. It costs 20 soles per person. The first colectivo leaves early in the morning, typically once it fills up (around 4–5 am), and the ride takes around 2.5-3 hours.
From Mollepata, take a taxi to Challacancha. Drivers usually wait for passengers. Expect to pay around 80 soles per car, so if others are heading to Challacancha, you can share the cost.
It’s the cheapest option if you find people to share a taxi with (4 people for the best-case scenario).
Option 2. Via a tour agency
We chose the easier option and arranged transportation through a tour agency in Cusco. They arranged seats in a van heading to Humantay Lake.
We checked a couple of agencies, and the prices were similar. We paid 50 soles per person, which included breakfast in Mollepata.
It was good value, more convenient than organising transport independently, and the breakfast was surprisingly good. I highly recommend this option. It’s the best overall value for most travellers. You pay only 50 soles for reliability and comfort.
Salkantay Trek: Trail Notes & Our Experience
Day 1. Soraypampa – Laguna Humantay – Soraypampa, 8.8 km / 5.5 mi
Salkantay Trek Day 1 Overview
- Route: Soraypampa – Laguna Humantay – Soraypampa
- Elevation gain: 530 m / 1,739 ft
- Starting elevation: 3,778 m / 12,395 ft
- Lowest point: 3,778 m / 12,395 ft
- Distance: 8.8 km / 5.5 miles
- Elevation loss: 400 m / 1,312 ft
- Ending elevation: 3,840 m / 12,598 ft
- Highest point: 4,280 m / 14,042 ft
Getting to the trailhead
We decided to make life easy and arrange transport to the trailhead through a travel agency in Cusco. Pick-up was between 4 am and 4.30 am, and the van arrived at 4:20 am. After collecting a couple of other travellers, we hit the road towards Mollepata, which took around 2.5 hours.
We stopped in Mollepata for about 30 min for breakfast, which was included in the price. It was a simple buffet setup, but pretty decent for the price, with scrambled eggs, bread, butter, jam, fresh fruit, coffee, and tea.
We were travelling in a van with a group heading to Laguna Humantay. Normally, the van continues all the way to Soraypampa. However, due to a landslide roughly halfway between Challacancha and Soraypampa, we had to get off earlier and walk for about 20 minutes to reach Soraypampa.
Somewhere along the way, the guide collected 20 soles per person for entry to Laguna Humantay and Salkantay, and we stopped at a checkpoint in Mollepata to purchase the tickets.
Where to stay in Soraypampa
There are quite a few accommodation options in Soraypampa. Most places are simple mountain lodges or cabins. Some can be booked online via Booking.com or Agoda, while others are only available if you’re hiking with a tour group.
If you’re doing the Salkantay Trek independently and don’t want to prebook, you can usually just walk around and find a place when you arrive, which is exactly what we did.
The first thing we did after arriving in Soraypampa was look for a place to stay for the night. We checked a couple of options. The first was Tio Nacho, which offered a bed in a twin room, dinner, breakfast, and wifi for 70 soles per person. A hot shower was available for an additional 10 soles per person.
We continued on and stayed at a place called Cabanas Andinas Eco Lodge Mama Andrea.
- Price: 80 soles per person
- Room: Twin room in separate cabins
- Included: Dinner and breakfast
- Wi-Fi: No
- Hot shower: No
The cabins were more private, and the location was closer to Humantay Lake, which also made the next morning easier. It was very quiet during the night. The cold shower wasn’t too bad during the day; it warmed up enough to be comfortable.
This place is also available on Agoda, and the price was the same as walking in (for two people).
One thing to double-check: it’s not clear if dinner is included when booking online.
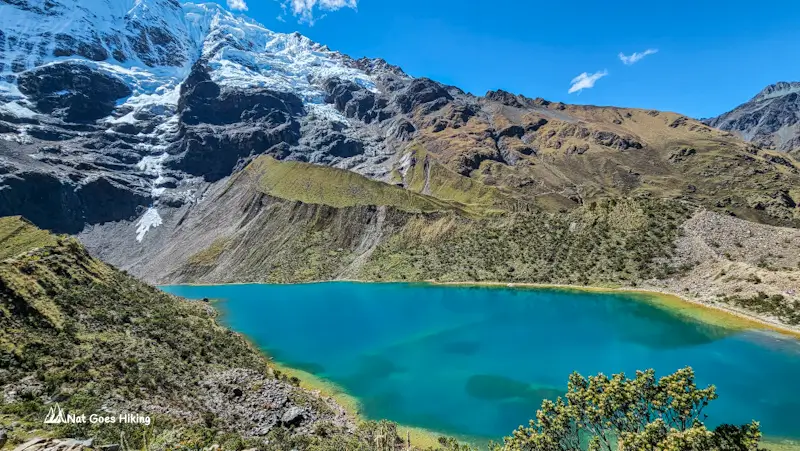
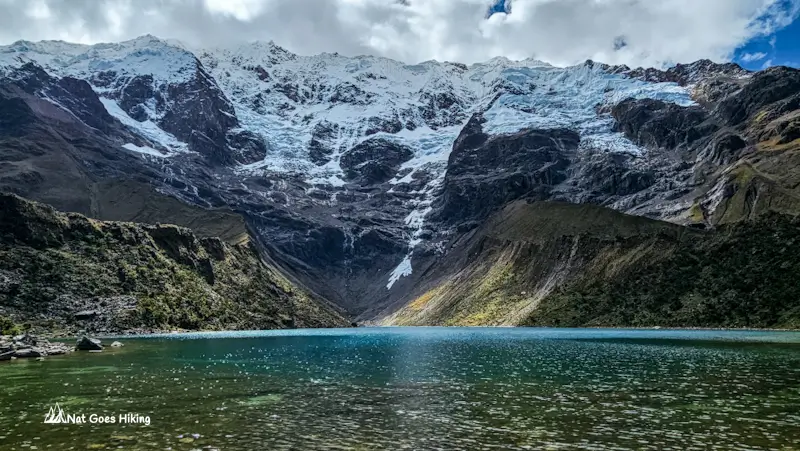
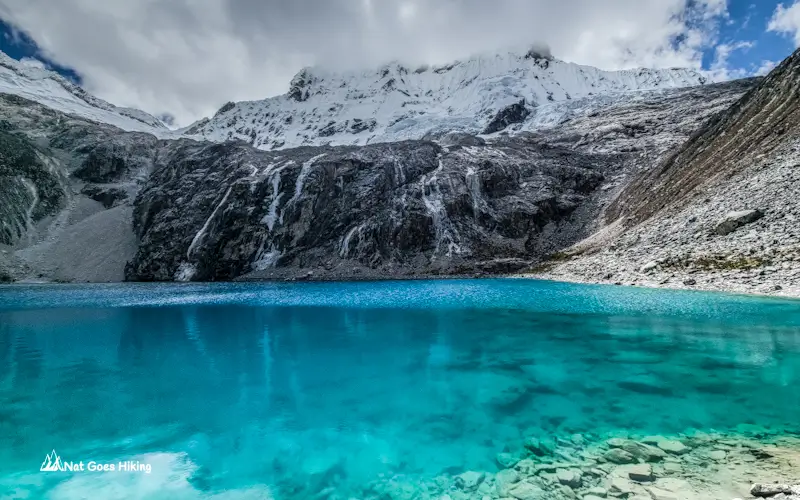
Side Trip: Laguna Humantay Hike, 7.3 km / 4.5 mi return
After a short rest at our cabin, we set out for Laguna Humantay, which is one of the highlights of the Salkantay Trek. The lagoon is about 3.25 km /2 mi from where we stayed in Soraypampa, and it was roughly 7.3 km /4.5 mi return (including walking near the lagoon), with an elevation gain of around 400 m / 1312 ft.
It’s not a long hike, but the altitude makes it feel tougher than it looks on paper. We made it to the lagoon in about 1 hour 40 min. The hike is uphill the entire way, with no flat sections to catch your breath. You feel the altitude, and it slows you down if you’re not acclimatised, but the views are absolutely worth it.
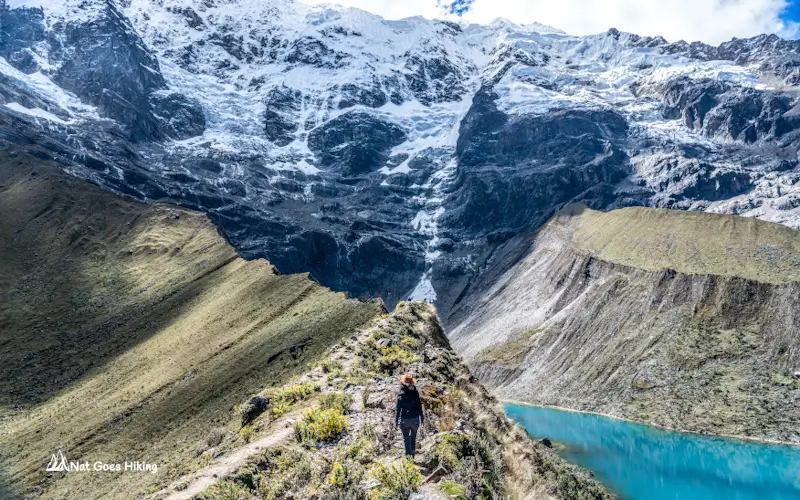
There are horses available for part of the trail if you struggle. The cost was 80 soles per person.
One thing worth mentioning is how dusty the trail can get. With lots of horses and heavy foot traffic, the path often turns into fine powder in dry conditions. It stays like this until you reach the greener sections of the trail.
Best time to visit Laguna Humantay
The trail to Laguna Humantay was quite busy. Most people arrive on day tours from Cusco, so there’s a steady flow of hikers. If you want to avoid the crowds, the best time to arrive at the lagoon is around 1 pm or a bit later. It does get noticeably quieter in the afternoon.
When we got to Laguna Humantay at about 12.30 pm, it was quite busy there. But honestly, the light was perfect, and the lagoon had that deep turquoise glow it’s famous for. We stayed for over an hour, soaking in the views and waiting for the crowds to thin slightly. But after 1.30 pm, the clouds started rolling in, and the lagoon’s bright turquoise tones faded under the shade. So it’s a bit of a trade-off.
Day 2. Soraypampa – Salkantay Pass – Wayramachay, 13.4 km / 8.3 mi
Salkantay Trek Day 2 at a Glance
- Route: Soraypampa – Salkantay Pass – Wayramachay
- Elevation gain: 850 m / 2,789 ft
- Starting elevation: 3,840 m / 12,598 ft
- Lowest point: 3,840 m / 12,598 ft
- Distance: 13.4 km / 8.3 miles
- Elevation loss: 820 m / 2,690 ft
- Ending elevation: 3,866 m / 12,684 ft
- Highest point: 4,630 m / 15,190 ft
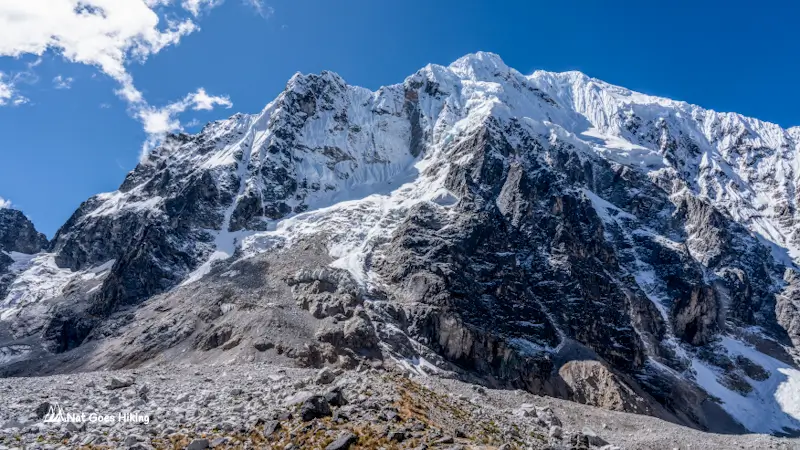
Day 2 of the Salkantay Trek is the toughest. On this day, you cross Salkantay Pass (4,630 m), the highest point of the trek.
From Soraypampa to Salkantay Pass, 7.4 km / 5.6 mi
We had breakfast at around 7.30 am and set off at about 8.20 am. Before leaving, we stocked up on drinks: a 2-litre bottle of water for 12 soles and a 750 ml Gatorade for 10 soles. There will be more shops as you walk through Soraypampa, and a small shop in about an hour of walking.
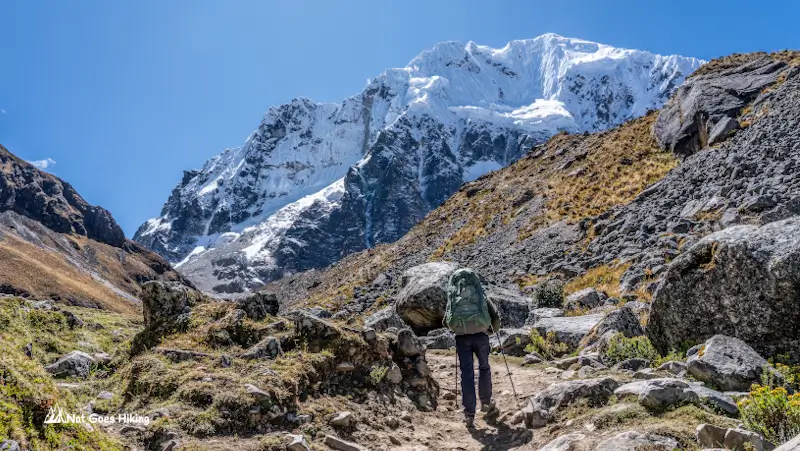
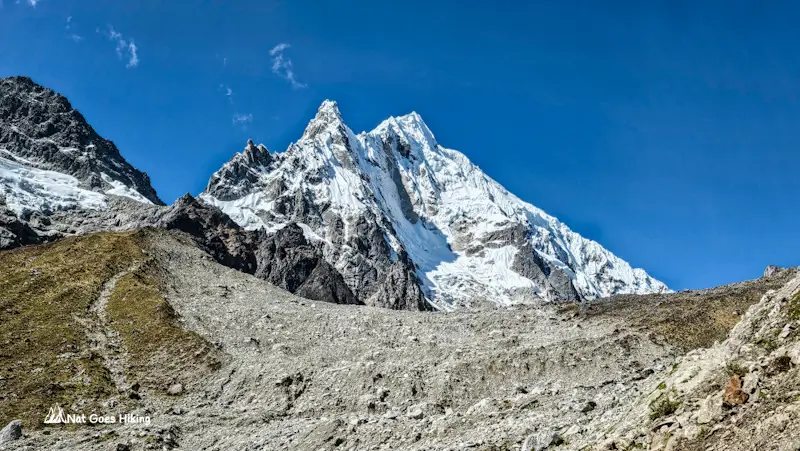
We started at an altitude of 3,840 m / 12,598 ft. The first km was fairly flat as we walked through Soraypampa. The climb to Salkantay Pass (4,630 m / 15,190 ft) is about 6.4 km /4 mi with ~850 m / 2,789 ft elevation gain. There’s no real flat section – it’s a steady uphill the whole way.
This section of the Salkantay Trek is shared with mules carrying gear for guided groups, and whenever they pass, you’ll get hit with a cloud of fine dust. Also, be sure to step aside, as they won’t stop for you.
Higher up, at around 4,280 m / 14,042 ft, the trail splits. We took the left path, a series of steep switchbacks known as Seven Snakes. The path on the right didn’t look like it was used very often.
From our accommodation, it took us just under 4 hours to reach Salkantay Pass. The climb was quite tough, especially with full backpacks.
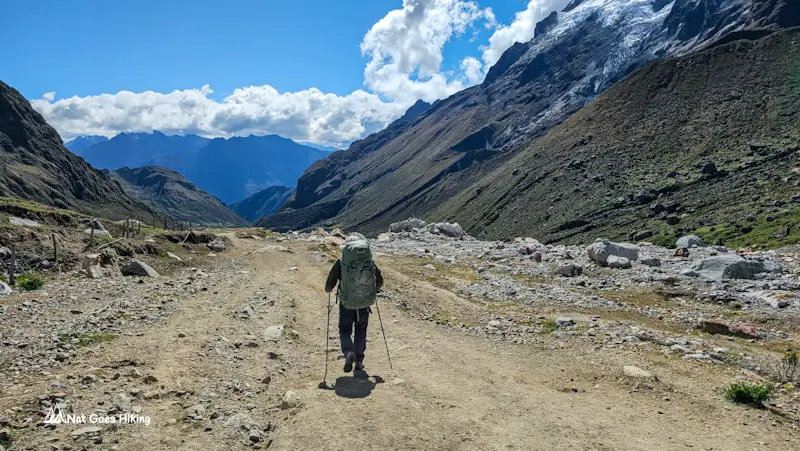
Descent from Salkantay Pass to Wayramachay, 6 km / 3.7 mi
After a break at the Salkantay Pass, we started the long descent towards Wayramachay.
From here, the Salkantay Trek continues downhill all the way to Lucmabamba, but the first section down to Wayramachay is the steepest.
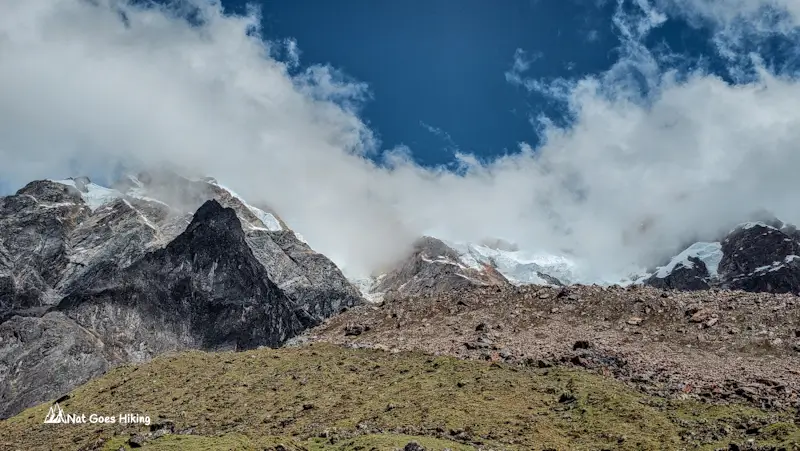
As we descended, the landscape gradually changed from a dry, barren high-altitude terrain into a greener valley.
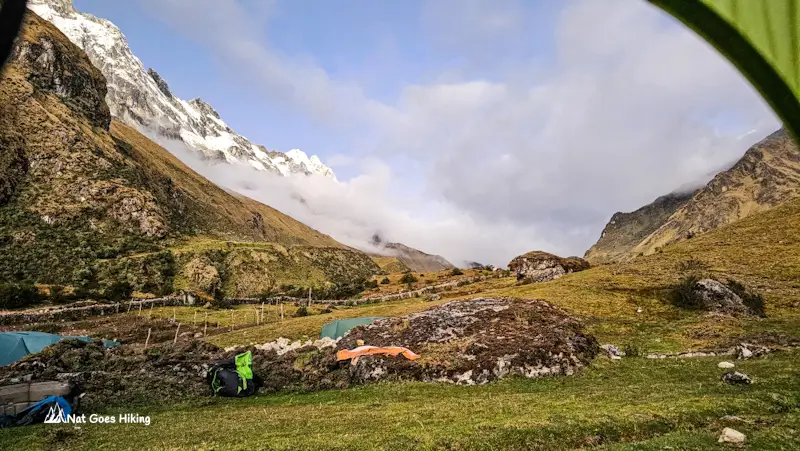
We reached Wayramachay around 3 pm and decided to stop there for the night.
Where to stay in Wayramachay
In Wayramachay, there is a place called Wayra Lodge, but it didn’t appear to be open to independent hikers. We stopped by out of curiosity, but no one responded.
There are a couple of campsites in the area. We ended up staying at the Alpaca Expeditions campground and paid 15 soles to pitch our tent.
When we arrived, the site was empty and peaceful. A local caretaker let us set up, but later in the afternoon, a large guided group arrived, and the area quickly filled up with tents.
There’s a small shop at the campsite where you can buy basic supplies: Gatorade, soft drinks, and snacks. No bottled water was available when we stayed there.
Honest Experience: Would I Stay Here Again?
To be honest, this was the part of the trek I’d do differently. We carried camping gear and chose to stop in Wayramachay, but in hindsight, I wouldn’t recommend it.
That night ended up being the least enjoyable of the entire Salkantay Trek, with a noisy campsite, staff drinking late into the night, and a drunk muleteer walking around and swearing.
Despite that, the location itself is stunning, with green grass and lush mountain slopes set against snow-capped peaks.
If I did the Salkantay Trek again, I would skip camping at Wayramachay. I’d hike light without camping gear, continue another 8 km to Chaullay, and stay in a guesthouse instead. We only camped once out of four nights, so it’s hardly worth carrying all the gear for that.
About 1 km before Wayramachay, there’s a small restaurant and shop on the trail. They were closing when we passed just before 3 pm, but it’s a good lunch stop if you get there earlier.
Day 3. Wayramachay – Collpapampa, 9.5 km / 5.9 mi
Salkantay Trek Day 3 at a Glance
- Route: Wayramachay – Collpapampa
- Elevation gain: 18 m / 59 ft
- Starting elevation: 3,866 m / 12,684 ft
- Lowest point: 2,831 m / 9,288 ft
- Distance: 9.5 km / 5.9 miles
- Elevation loss: 1,055 m / 3,461 ft
- Ending elevation: 2,831 m / 9,288 ft
- Highest point: 3,866 m / 12,684 ft
Day 3 of the Salkantay Trek was short and easy, especially compared to the previous day. The entire route is mostly downhill, covering around 9.5 km /5.9 mi with approximately 1,055 m /3,461 ft of elevation loss. It took us about 3.5 hours to get to Collpapampa.
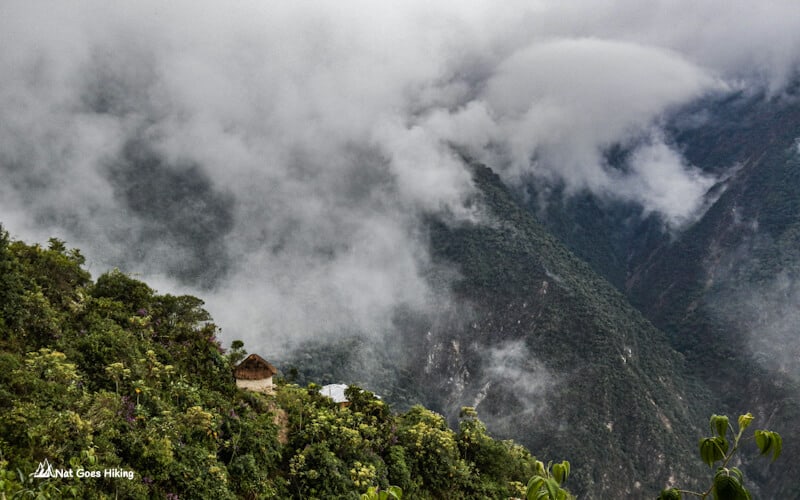
After the high-altitude section near Salkantay Pass, the landscape changes completely. As you descend below 3,800 m /12,467 ft, the terrain becomes noticeably greener, with vegetation replacing the rocky mountain scenery.
This section is where the trek starts transitioning into the cloud forest zone. It’s one of the most visually dramatic changes on the entire route.
Halfway between Wayramachay and Chaullay, there is a small shop with snacks and drinks.
Chaullay
Chaullay is the first larger settlement on this section of the Salkantay Trek.
It sits in a green valley and has a wide range of guesthouses, lodges, small local restaurants, and small shops. If you’re not planning to camp at Wayramachay, this is one of the most comfortable places to stop after descending from Salkantay Pass.
We stopped for a short break, then continued to Collpapampa, which lies on the other side of the river, about a 1.5 km /0.9 mi walk from Chaullay.
Where to stay in Collpapampa
Collpapampa (also spelled Colcapampa) is another common overnight stop on the Salkantay Trek. There is a wide choice of accommodation, and many of them are available on Booking.com and Agoda.
We stayed at Hospedaje El Molle-Capulichayoc (just a heads up: the location on Booking.com is slightly off, but Google Maps shows the correct spot).
We paid 50 soles per person, which included a double room in a small cabin, dinner, breakfast, wifi, and a hot shower. The cabins were simple but clean, and after the previous night, having a proper hot shower was a real treat.
When we arrived, we asked if they could make us some lunch, and they prepared chicken for 15 soles. It was exactly what we needed after the hike.
The night was very quiet, and we slept really well.
Day 4. Collpapampa – Lucmabamba, 18.7 km / 11.6 mi
Salkantay Trek Day 4 at a Glance
- Route: Collpapampa – Lucmabamba
- Elevation gain: 248 m / 814 ft
- Starting elevation: 2,831 m / 9,288 ft
- Lowest point: 2,063 m / 6,768 ft
- Distance: 18.7 km / 11.6 miles
- Elevation loss: 1,020 m / 3,346 ft
- Ending elevation: 2,063 m / 6,768 ft
- Highest point: 2,831 m / 9,288 ft
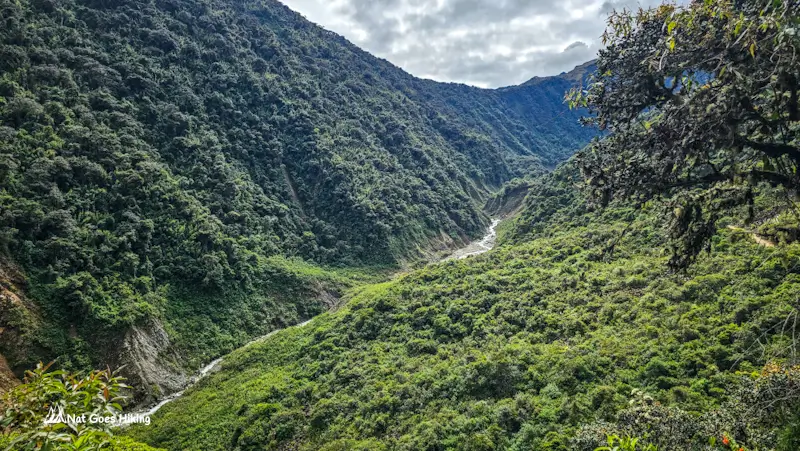
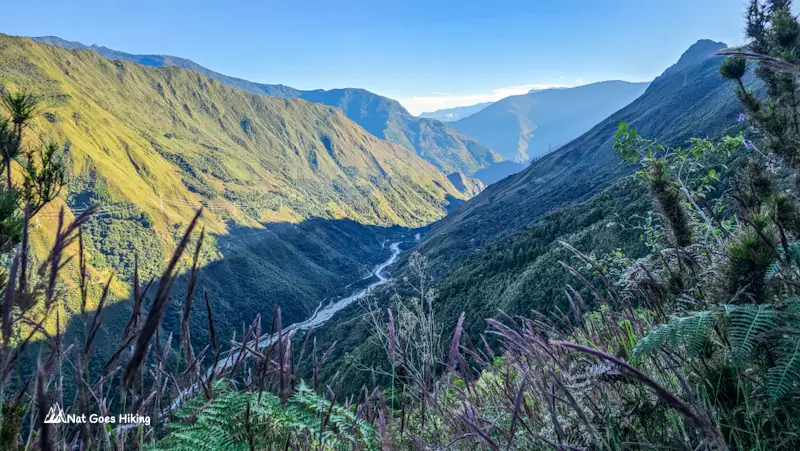
At Collpapampa, the Salkantay Trek meets the Choquequirao Trek, and from here onwards, both trails follow the same path toward Machu Picchu. This section starts with a gentle descent through the cloud forest, following the Santa Teresa River for roughly the first 6.5 km /4 mi.
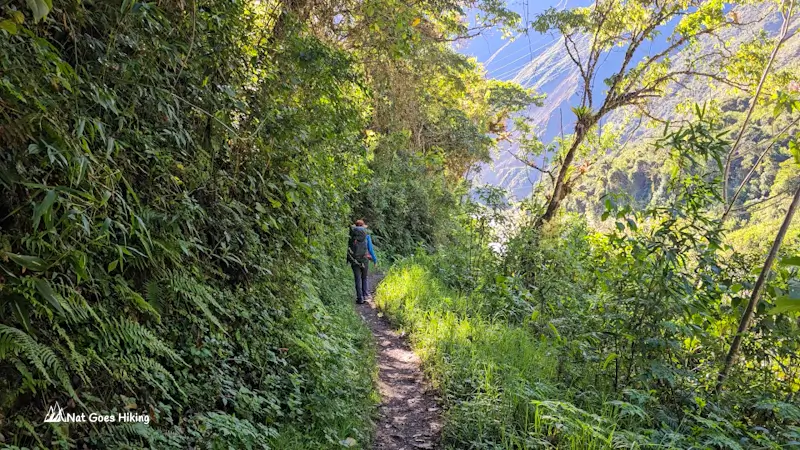
We walked through dense green cloud forest, crossed small streams, and passed several waterfalls along the way. The lower altitude also made a big difference: it felt much warmer and noticeably more humid compared to the high mountain sections earlier in the trek.
It was a relaxed and scenic hike, especially compared to the demanding days around Salkantay Pass.
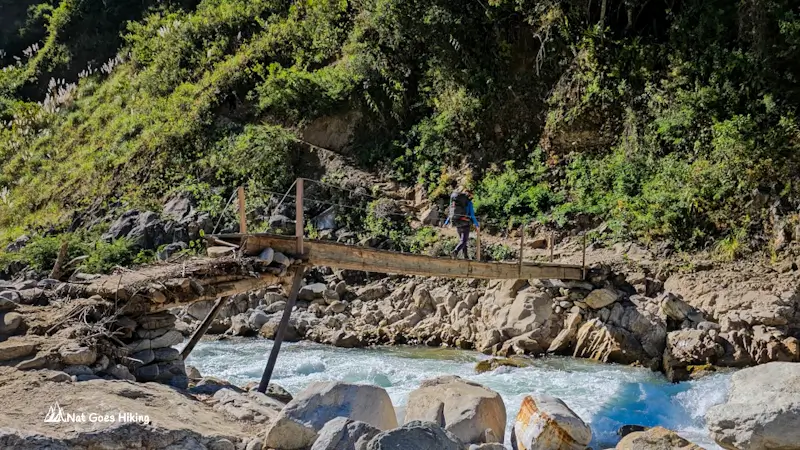
Landslide Detour
After about 6.5 km, we reached a section affected by a landslide, which meant we had to cross a bridge and continue along a wider dirt road.
Just before the bridge, we passed Wiñaypoco campsite, a really nice spot with rustic huts and a small shop. You can buy sandwiches, fresh juice, and coffee there, which makes it a good rest stop if you’re passing through.
Dusty Road to Lucmabamba
After the bridge, the trail changes completely. We ended up walking along a dusty road shared with cars and tour vans for about 12.2 km until Lucmabamba. Because of the dust and traffic, consider taking a passing vehicle; it would make this stretch much more comfortable.
Along the way, we passed plantations of avocado and granadilla, and bought fresh granadillas for 2 for 1 sol, which was incredibly cheap compared to Cusco prices.
Where to stay in Lucmabmba
We reached Lucmabamba in the afternoon and checked into the first guesthouse we found – Eco Inka Trail Lodge. It was simple but clean, with fresh bedsheets and a hot shower, although the location near the road made it a bit noisy. There’s also a small shop right in front of the lodge.
If you continue slightly further uphill, there are quieter lodges tucked deeper into the cloud forest, which would be a more peaceful option. Viamonte EcoLodge (9.9 out of 10), Lucmabamba Lodge (9.8 out of 10), and Refugio de Mery Lucmabamba have the highest rating. Lucmabamba Lodge and Refugio de Mery Lucmabamba also offer coffee tours.
My Takeaway from this section of the trek
If I did this part of the Salkantay Trek again, I would:
- try to skip or shorten the dusty road section by taking transport where possible
- walk a little further past Lucmabamba to find a quieter stay in the forest
Day 5. Lucmabamba – Llactapata – Hidroelectrica – Aguas Calientes, 24.2 km /15 mi
Salkantay Trek Day 5 at a Glance
- Route: Lucmabamba – Llactapata – Hidroelectrica – Aguas Calientes
- Elevation gain: 880 m / 2,887 ft
- Starting elevation: 2,065 m / 6,774 ft
- Lowest point: 1,790 m / 5,873 ft
- Distance: 24.2 km / 15.0 miles
- Elevation loss: 1,030 m / 3,379 ft
- Ending elevation: 2,020 m / 6,627 ft
- Highest point: 2,770 m / 9,088 ft
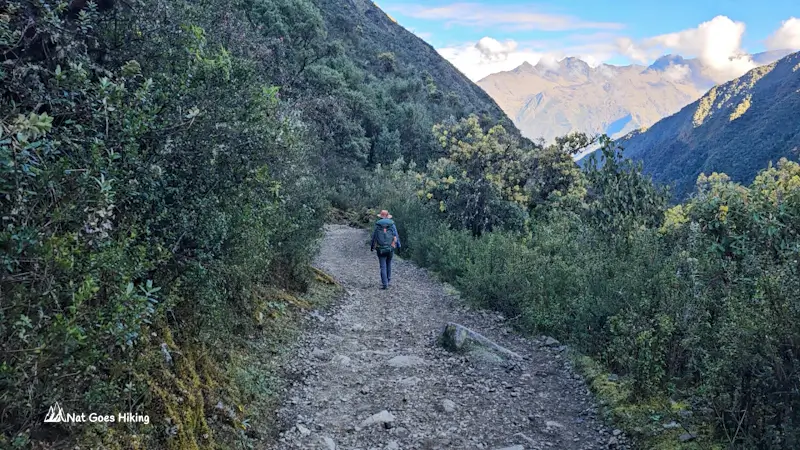
After a good night’s sleep in Lucmabamba and stocking up on snacks and drinks for the day, early in the morning, we started the climb toward the Llactapata ruins. The hike was steadily uphill but manageable.
Coffee Farms and Trail Stops
This section of the Salkantay Trek passes through a lush coffee-growing region with dense greenery.
If you didn’t do it the previous day, you can stop for a coffee tour along the way. And if you’re staying at Llactapata Lodge & Camp, you’ll have plenty of time to do so.
After about 4.5 km, we reached a small rest stop with a basic shop. You can buy water, soft drinks, fresh orange juice, coffee, and sandwiches. There is also a toilet available for 1 sol.
There will be another small shop closer to the Llactapata ruins.
Reaching Llactapata Ruins
It took us around 2 hours 40 minutes to reach the Llactapata ruins, with a total elevation gain of about 880 m / 2,887 ft.
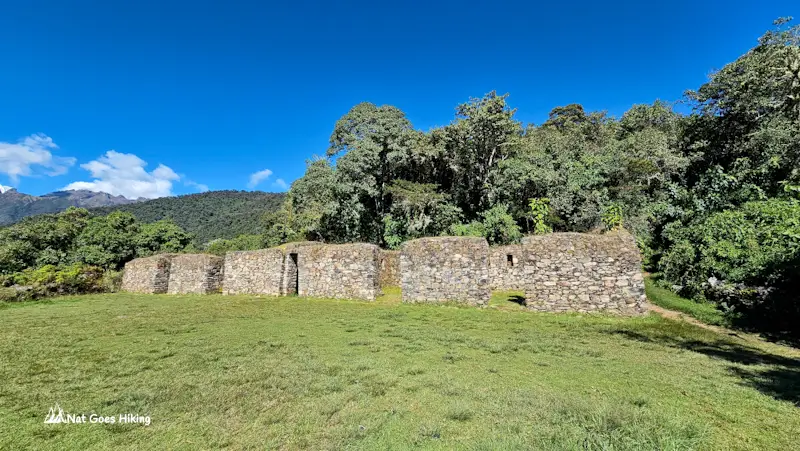
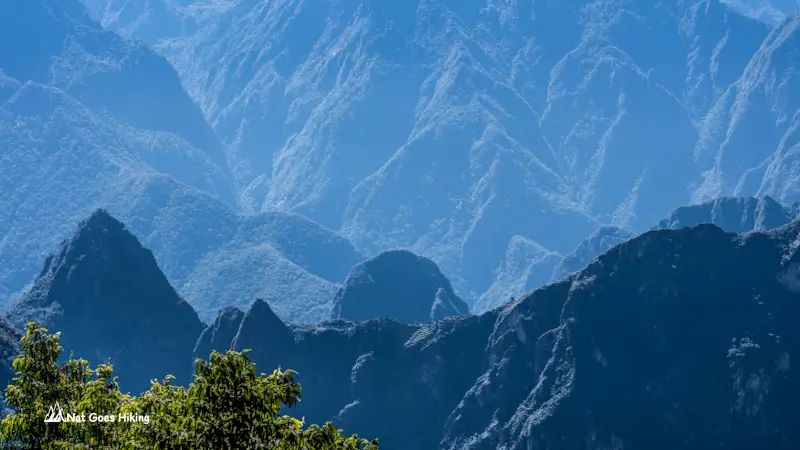
The ruins sit at roughly 2,770 m /9,088 ft above sea level, and from there, we got our first view of Machu Picchu. It’s not the classic viewpoint, but that’s exactly what makes it special.
We spent some time exploring the ruins and enjoying the view before continuing downhill.
Optional Llactapata Lodge & Camp
If you feel tired and would like to break up the hike, you can stay overnight at Llactapata Lodge & Camp. It’s located in a peaceful setting, about 1 km downhill from the ruins, and offers amazing views.
Llactapata to Hydroelectrica
From Llactapata, we continued descending towards Hidroelectrica. This section is about 5 km (3.1 mi) downhill, with a steep descent and roughly 1,030 m (3,379 ft) of elevation loss. Compared to earlier days, it’s not the most scenic part of the Salkantay Trek. I was already tired and ended up falling a couple of times.
Hidroelectrica is a good place to take a break: there were a few food stalls where you can grab lunch before continuing to Aguas Calientes.
If you’ve already been to Machu Picchu and aren’t planning to visit again, you can continue your journey to Ollantaytambo or Cusco from Hidroelectrica.
From Hidroelectrica, you can travel to Cusco or Ollantaytambo by tourist van for around 50 soles. If you’re on a tighter budget, take a colectivo to Santa Teresa, switch to another colectivo to Santa Maria, and then catch a bus to Cusco.
Hydroelectrica to Aguas Calientes (Railway Walk)
From Hidroelectrica, we followed the railway line for about 12 km /7.5 miles to reach Aguas Calientes. It took us around 2.5 hours.
This section is quite relaxed compared to the rest of the trek. The walk is mostly flat and very straightforward: you simply follow the railway line. Much of the trail is shaded as it passes through lush cloud forest.
Important: Don’t walk on the train tracks. It’s prohibited and unsafe, as trains do use this line.
Staying in Aguas Calientes
Aguas Calientes is a busy little town and has everything from budget hostels and a campsite to high-end luxury hotels. While we stayed in a simple guesthouse, there are also premium options like Inkaterra or Sumaq for those looking to treat themselves after the trek.
Day 6. Visit to Machu Picchu, 3.5 km / 2.17 mi
Salkantay Trek Day 6 at a Glance
- Route: Aguas Calientes – Machu Picchu
- Elevation gain: 466 m / 1,529 ft
- Starting elevation: 2,020 m / 6,627 ft
- Lowest point: 2,020 m / 6,627 ft
- Distance: 3.5 km / 2.17 mi (one way)
- Elevation loss: 97 m / 318 ft
- Ending elevation: 2,384 m / 7,822 ft
- Highest point: 2,384 m / 7,822 ft
There are two main ways to reach the entrance of Machu Picchu: by bus or on foot.
Take the Bus (Fastest & Easiest)
The bus follows a steep 8 km road with tight switchbacks up the mountain.
- First bus: 5:30 am
- Frequency: every 10–15 minutes (more frequent early morning)
- Travel time: ~30 minutes
You can buy tickets online in advance or at the ticket office in town.
One thing to keep in mind: queues can get long. We saw lines of 30–60 minutes, and even longer during peak season.
This is the easiest option, especially if you want to save energy before exploring Machu Picchu.
Option 2: Hike Up
The alternative is to hike up from Aguas Calientes. The trail is about 3.5–4 km, following steep shortcuts that cut across the road. It’s a proper uphill climb the whole way.
We chose to hike all the way to Machu Picchu, just for the experience. It took us roughly an hour to reach the entrance.
Which Option Is Better?
- Take the bus if you want to save energy or arrive fresh.
- Hike up if you’re happy for one last climb and want to avoid queues.
Having hiked up, my honest opinion is that you won’t miss anything by taking the bus. There’s nothing particularly special about this hike.
Best time for Salkantay Trek
You can do the Salkantay Trek year-round, but the experience changes a lot depending on when you go. If you care about views, safety, and overall experience, timing really matters.
Here’s a clear breakdown of the best time for the Salkantay Trek.
Dry Season: May to September
This is widely considered the best time for the Salkantay Trek, and honestly, it’s the most popular for a reason.
What it’s like:
- Clear skies almost every day
- Unreal views of Salkantay Mountain and the surrounding peaks
- Cold nights, especially at higher camps
- Dry trails = safer hiking conditions
This is when I’d recommend doing it. I did the Salkantay Trek in June, and honestly, the weather was perfect. Mornings were crisp but sunny. By midday, I was hiking in a t-shirt. Nights were cold, but nothing extreme with a good sleeping bag if you camp. If you’re staying in lodges, they provide enough blankets to keep you warm.
The views around the Salkantay Pass are next level in the dry season. You actually get those big cinematic mountain shots people go for.
The downside? It’s busier. Especially June–August.
Shoulder Months: April & October
If you want a quieter experience without taking a big risk on the weather, this is the smartest time to go.
Why it works:
- Fewer crowds than peak season
- Still relatively stable weather: you might get some rain, but it’s usually not the heavy, all-day kind.
- Landscapes are greener (especially in April)
This is probably the best balance between good weather and fewer people.
Rainy Season: November to March
This is the least recommended time for the Salkantay Trek, and local operators often warn about it.
What to expect:
- Heavy rain, especially in the afternoons
- Muddy and slippery trails
- Clouds blocking mountain views
- Higher chance of landslides
- Humid conditions in the lower jungle sections
January and February are usually the worst months. It’s better to avoid hiking during these months
How much does the Salkantay Trek cost without a tour?
The classic 5-day Salkantay Trek costs around US$700. From my experience, for multi-day hikes, local companies in Cusco charge roughly the same whether you book online or enquire in person.
We did the Salkantay Trek in June 2025, and below is a breakdown of our expenses. Our total came to US$195 per person, which is much lower than the typical US$700 guided price.
Cost Breakdown: Salkantay Trek without a Tour (2 people)
Expenses usually included in a tour
- Entrance fee to Laguna Humantay and Salkantay: S/20 × 2 = S/40 (US$11.8)
- Transport to Soraypampa: S/50 × 2 = S/100 (US$29.5)
- Accommodation in Soraypampa: S/80 × 2 = S/160 (US$47.2) (incl. dinner and breakfast)
- Camping at Wayramachay: S/15 (US$4.4)
- Accommodation in Collpapampa: S/50 × 2 = S/100 (US$29.5) (incl. dinner and breakfast)
- Lunch in Collpapampa: S/30 (US$8.8)
- Accommodation in Lucmabamba: S/60 × 2 = S/120 (US$35.4) (incl. dinner and breakfast)
- Accommodation in Aguas Calientes (2 nights): S/240 (US$70.8)
- Machu Picchu tickets: S/152 × 2 = S/304 (US$89.7)
- Meals in Aguas Calientes: S/90 (US$26.5)
- Shared van from Hidroelectrica to Ollantaytambo: S/50 × 2 = S/100 (US$29.5)
Extra costs usually not included in a tour
- Drinks and snacks on the trail: S/68 (US$20)
- Drinks and snacks in Aguas Calientes: S/45 (US$13.3)
- Toilet: S/5 (US$1.5)
There are small things like drinks, snacks, and toilet fees that add up on the trail. Once you’re at your accommodation, the toilets are free. In some places, you can also ask for hot boiled water to make tea.
What to pack for the Salkantay Trek
The Salkantay Trek passes through multiple climate zones, from high-altitude Andes to hot and humid cloud forest, so you need to be prepared for changing conditions.
One of the great advantages of this trek is that you can hike light from lodge to lodge and don’t need to carry camping gear. Below is a packing list for the Salkantay Trek without camping equipment.
Salkantay Trek Packing List for Lodge-to-Lodge Hiking
Backpack
25–30 litre hiking backpack + rain cover is sufficient if you hike lodge to lodge.
Clothes
Wear layers. For colder weather at high altitude (first 2 days of the trek), wear a base layer, fleece jacket, and a light down jacket. You can easily add or remove layers as needed during the hike.
- Breathable, quick-dry T-shirt or shirt (long sleeves recommended for sun protection)
- Breathable, quick-dry hiking pants
- Change of breathable travel underwear
- Extra hiking socks
- Gloves and a warm hat (for cold mornings and evenings)
- Buff / neck gaiter (for dust, sun protection, and warmth at high altitude)
- Rain jacket (also works as wind protection)
Footwear
- Hiking shoes (ideal for lodge-to-lodge trekking without a heavy backpack)
- Lightweight hiking boots (optional for extra support or weak ankles)
- Crocs or flip flops (for evenings at lodges)
Sun Protection
The sun in the Andes is intense.
- SPF sunscreen
- SPF lip balm
- Sunglasses
- Hat or cap
Gear
- Hiking poles
- GPS device or phone with offline navigation app
- Headlamp
- Water filter (optional but useful as backup)
- Power bank (lodges have electricity, but useful during the day)
Other Essentials
- Microfiber towel
- Snacks (or buy along the trail)
- Tissues / toilet paper
- Body wipes
- Insect repellent
- Toiletries
- Dry bag or ziplock bags (for rain protection)
Medical Kit
- First aid kit
- Diamox (for altitude sickness)
- Paracetamol
- Imodium (for upset stomach)
- Any personal medication
Cash
Bring enough for entrance fees, accommodation, meals, drinks, snacks, and toilet fees.
FAQ Salkantay Trek
No, unlike the Inca Trail, hikers don’t require a permit for the Salkantay Trek.
Yes, you can do the Salkantay Trek without a guide, and it’s one of the easiest multi-day hikes in Peru to do independently. No permit is required, and you can hike light without carrying full camping gear. The trail is easy to follow, with plenty of places to stay along the way.
A 5-day guided Salkantay Trek usually costs around US$700 per person. We did it independently in June 2025, camping for one night and staying in guesthouses the rest of the time, and spent US$195 per person.
The highest elevation on the Salkantay Trek is Salkantay Pass (4,630 m / 15,190 ft).
The Salkantay Trek is roughly 70–78 km / 43.5-48.5 mi, depending on the route.
The Salkantay Trek is considered moderate to challenging, mainly due to the altitude. Day 2 is the toughest, when you cross Salkantay Pass (4,630 m / 15,190 ft) with an elevation gain of around 850 m / 2,789 ft. Days 3 and 4 are mostly downhill and are much easier. If you choose to visit the Llactapata ruins on Day 5, expect a climb of about 880 m / 2,887 ft.
Yes, on Day 5 from the Llactapata ruins, you can see Machu Picchu in the distance. It’s not a close-up view, but it’s a unique and rewarding perspective.
Related Posts
Want more inspiration for travel in Peru and Bolivia? Check out these posts:
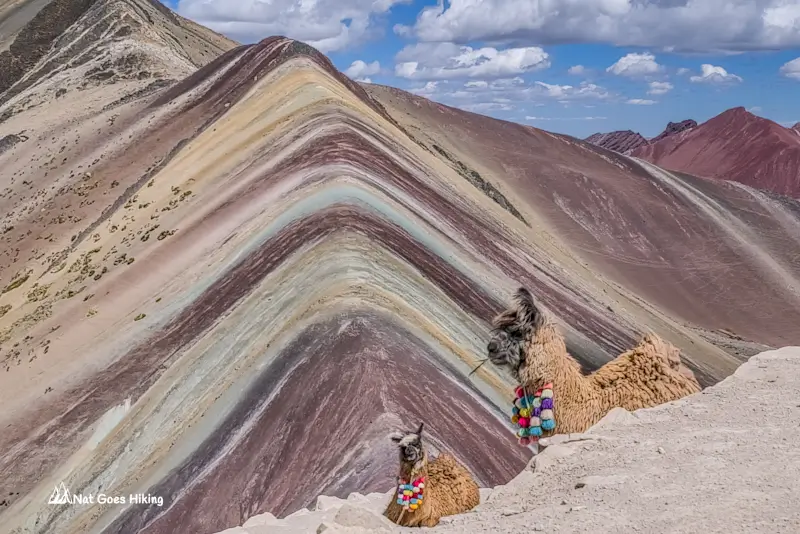
Planning to visit Vinicunca Rainbow Mountain? Here’s how I avoided the crowds at Rainbow Mountain, plus tips on going independently from Cusco.

Looking for a quieter alternative to Vinicunca? Palccoyo offers multiple rainbow mountains, easier hiking, and far fewer crowds. Read my complete guide on how to visit without a tour.
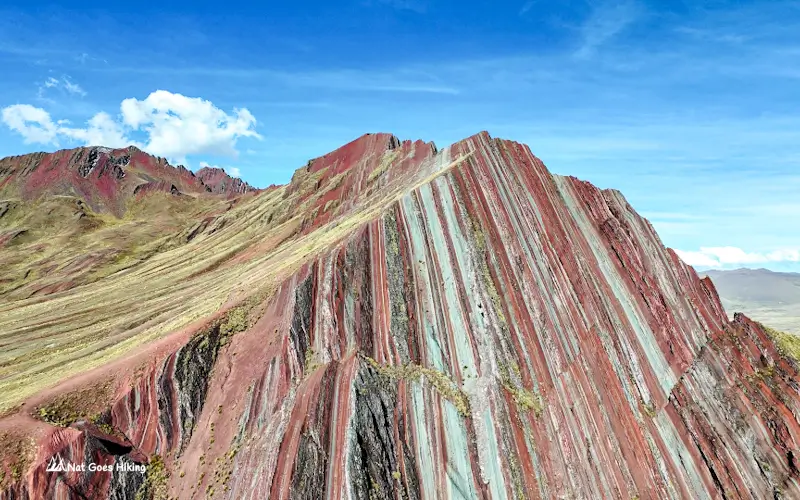
Want more inspiration for travel in Peru? Discover Pallay Punchu, an off‑the‑beaten‑path alternative to Rainbow Mountain you can visit without a guide.
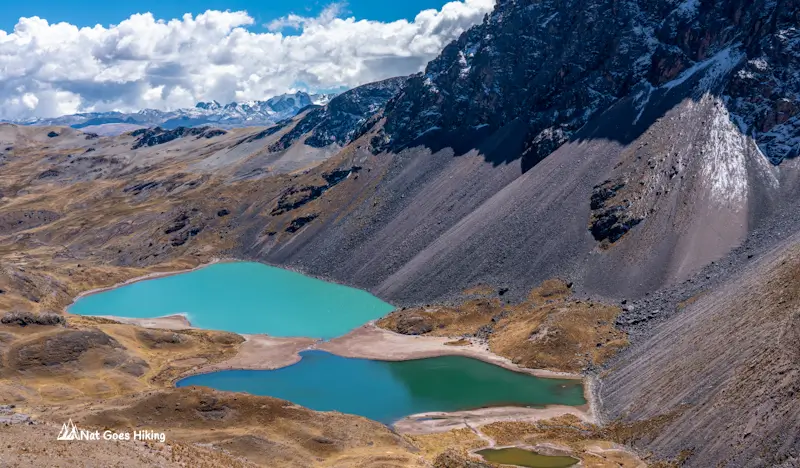
Seven colourful glacial lakes, views of Ausangate, alpacas roaming the valleys, and hot springs at the finish. We share our experience, costs, transport tips, and whether it’s worth doing without a tour.
Want to hike to Machu Picchu without a guide? Choquequirao Trek is a great alternative to the Inca Trail. Learn everything you need here.
Short on time for the full Huayhuash Circuit? This 4-day mini Huayhuash Trek without a guide still includes some of the trek’s most iconic views.
I hiked the Laguna 69 Hike in July 2025. Here’s what the photos don’t show: trail conditions, crowd levels, new 2026 access rules, costs, and more.
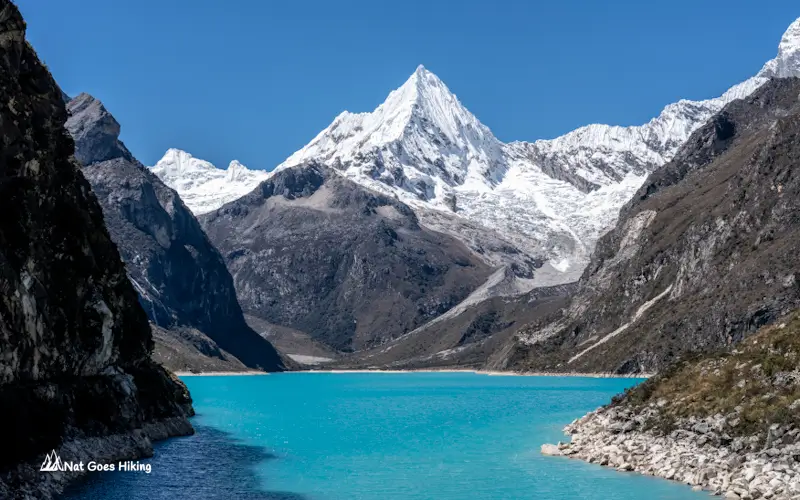
Planning hiking in Huaraz? Find the best day hikes and multi-day treks near Huaraz, including Laguna 69, Parón, Santa Cruz and Huayhuash with practical travel tips.
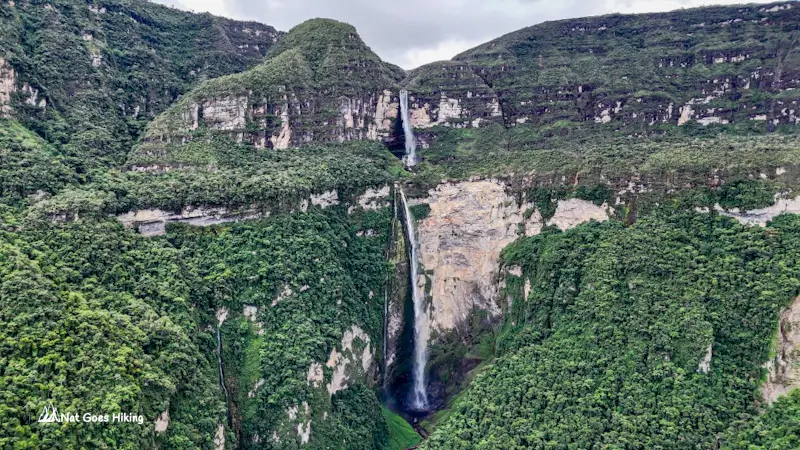
Planning the Gocta Waterfall hike? Learn about the trail, entrance fee, tour vs independent hike, costs, best time to visit and practical tips based on our July 2025 visit.
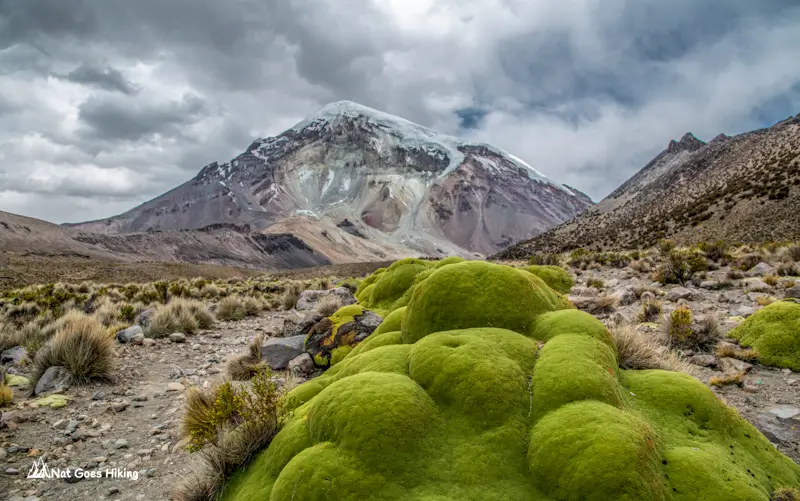
Sajama National Park is Bolivia’s hidden gem. This travel guide covers what to do, how to get there, where to stay, and useful tips from our experience.
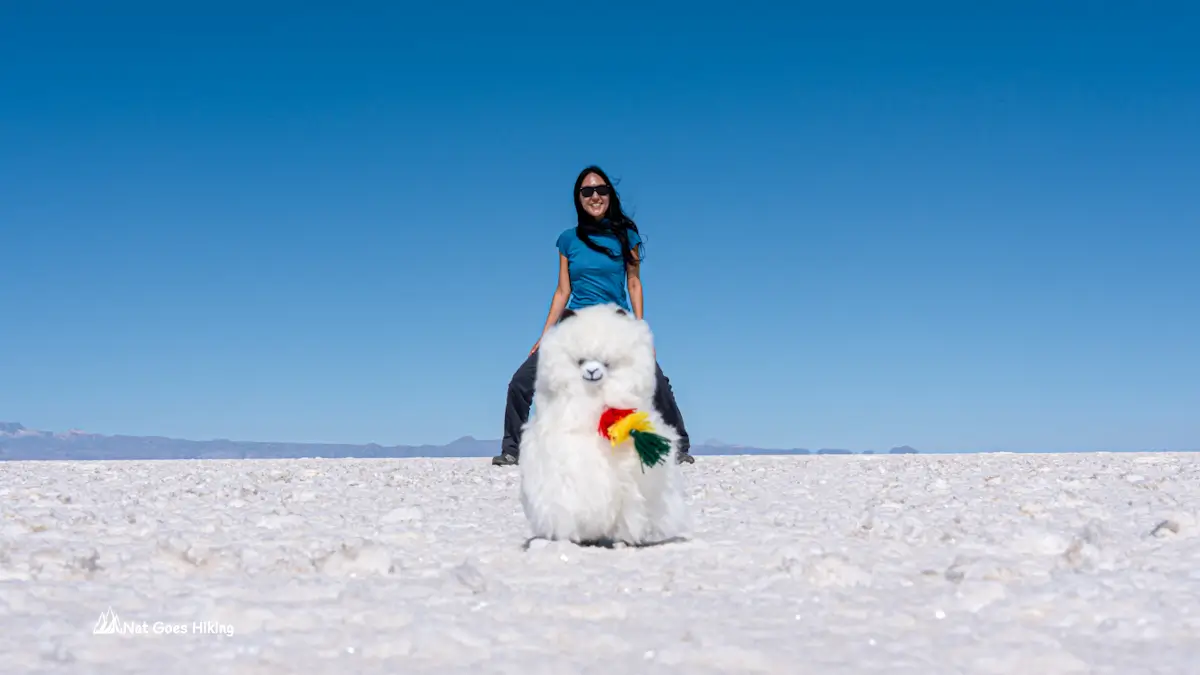
Planning a trip to Salar de Uyuni? Discover what to expect, the best time to visit, and whether to go independently or join a tour..

Although Bolivia is one of the most underrated countries, it has so much to offer. Wondering what the top things to do in Bolivia are?